
Install Guide
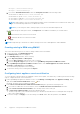


Table Of Contents
- OpenManage Integration for VMware vCenter Version 4.3 Web Client Installation Guide
- Introduction
- OpenManage Integration for VMware vCenter licensing
- Important notes for reference
- Hardware requirements
- Software requirements
- Port information
- Prerequisite checklist
- Installing, configuring, and upgrading OMIVV
- Downloading OpenManage Integration for VMware vCenter
- Deploying OMIVV OVF using vSphere web client
- Generating Certificate Signing Request
- Uploading HTTPS certificate
- Registering vCenter Server by non-administrator user
- Registering OpenManage Integration for VMware vCenter and importing license file
- Upgrading registered vCenter
- Verifying installation
- Updating virtual appliance repository location and virtual appliance
- Upgrading OMIVV from existing version to current version
- Updating appliance through backup and restore
- Recovering OMIVV after unregistering earlier version of OMIVV
- Appliance configuration for VMware vCenter
- Accessing documents from the Dell EMC support site
- Related Documentation

● https://share/filename.xml.gz
● https://share/filename.gz
b. If you select Shared Network Folder, enter the Catalog File Location in the following format:
● NFS share for .XML file—host:/share/filename.xml
● NFS share for .gz file—host:/share/filename.gz
● CIFS share for .XML file—\\host\share\filename.xml
● CIFS share for .gz file—\\host\share\filename.gz
NOTE: OMIVV supports only Server Message Block(SMB) version 1.0 and SMB version 2.0 based CIFS shares. Dell
EMC recommends using SMB version 2.0 based CIFS shares.
NOTE: If you are using CIFS share, OMIVV prompts you to enter the username and password.
c. To validate the given catalog file location, click Begin Test. This validation is mandatory to continue further.
—Indicates that the test connection is successful.
—Indicates that the test connection is failed.
3. Click Apply.
NOTE: It might take up to 10 minutes to read the catalog from the source and update the OMIVV database.
Creating catalog in DRM using OMIVV
This section describes the process to create a catalog in DRM version 3.0 and later.
1. On the Home page, click Add New Repository.
The Add Repository window is displayed.
2. In the Add Repository window, do the following:
a. Enter Repository Name and Description.
b. From the Base Catalog drop-down menu, select a catalog.
c. From the Integration Type drop-down menu, select OpenManage Integration for VMware vCenter.
3. In the OpenManage Integration for VMware vCenter window, enter Virtual Appliance IP, vCenter Server IP,
Username, and Password, and click Connect.
The created catalog is displayed on the home page.
4. To export the catalog, select a catalog and click Export.
Configuring latest appliance version notification
To receive periodic notification about the availability of latest version (RPM, OVF, RPM/OVF) of OMIVV, perform the following
steps to configure the latest version notification:
1. In the OpenManage Integration for VMware vCenter, on the Manage → Settings tab, under Appliance Settings, at the
right side of Latest Version Notification, click the
icon.
By default, the latest version notification is disabled.
2. In the Latest Version Notification and Retrieval Schedule dialog box, perform the following actions:
a. If you want to enable latest version notification, select the Enable Latest Version notification check box.
b. Under Latest Version Retrieval Schedule, select the days of the week for this job.
c. In Latest Version Retrieval Time, specify the required local time.
The time you provide is your local time. Ensure that you calculate any time difference for running this task at a proper
time on the OMIVV appliance.
3. To save the settings, click Apply, to reset the settings, click Clear, and to abort the operation, click Cancel.
34
Appliance configuration for VMware vCenter