OpenManage Integration for VMware vCenter for Desktop Client User's Guide Version 3.1 February 2016 Rev.
Notes, Cautions, and Warnings NOTE: A NOTE indicates important information that helps you make better use of your computer. CAUTION: A CAUTION indicates either potential damage to hardware or loss of data and tells you how to avoid the problem. NOTE: A WARNING indicates a potential for property damage, personal injury, or death. Copyright © 2017 Dell Inc. or its subsidiaries. All rights reserved. Dell, EMC, and other trademarks are trademarks of Dell Inc. or its subsidiaries.
Contents Chapter 1: Overview...................................................................................................................... 8 OpenManage Integration for VMware vCenter .......................................................................................................... 8 Key Features.........................................................................................................................................................................
Chapter 4: End-To-End Hardware Management........................................................................... 30 Monitoring the Datacenter And Host System............................................................................................................30 Understanding Events And Alarms..........................................................................................................................30 vSphere Client Host Overview........................................................
Renaming Hypervisor Profiles.................................................................................................................................. 55 Deleting Hypervisor Profiles..................................................................................................................................... 55 Refreshing Hypervisor Profiles................................................................................................................................
Frequently Asked Questions (FAQ).............................................................................................................................. 74 Dell privileges that are assigned while registering the OMIVV appliance are not removed after unregistering OMIVV..............................................................................................................................................
On trying a firmware update with an invalid DUP, the hardware update job status on the vCenter console neither fails nor times-out for hours, though the job status in LC says ‘FAILED’. Why is this happening?................................................................................................................................................... 82 What Setting Should I Use For UserVars.CIMoeMProviderEnable With ESXi 4.1 U1?...............................
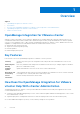
1 Overview Topics: • • • • • OpenManage Integration for VMware vCenter Key Features How Does the OpenManage Integration for VMware vCenter Help With vCenter Administration OpenManage Integration for VMware vCenter Features What's new in this release OpenManage Integration for VMware vCenter VMware vCenter is the primary console used by IT administrators to manage and monitor VMware vSphere ESXi hosts.
● Integrates with standard vCenter authentication, rules, and permissions.
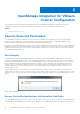
2 OpenManage Integration for VMware vCenter Configuration The following sections provide step-by-step instructions for the OpenManage Integration for VMware vCenter initial configuration. Upgrade, uninstallation, and security role information are also covered in the following sections. Topics: • Security Roles and Permissions Security Roles and Permissions The OpenManage Integration for VMware vCenter stores user credentials in an encrypted format.
vCenter server's built-in roles and privileges model to authorize user actions with the virtual appliance and the vCenter managed objects (hosts and clusters). Figure 2. vCenter vSphere Client Roles and Privileges Dell Operational Role Contains the privileges/groups to accomplish appliance and vCenter server tasks including firmware updates, hardware inventory, restarting a host, placing a host in maintenance mode, or creating a vCenter Server task.
Figure 3. Dell Infrastructure Deployment Role The privileges that his role provides are Create Template, Configure HW Configuration Profile, Configure Hypervisor Deployment Profile, Configure Connection Profile, Assign Identity, and Deploy. Dell.
● ● ● ● ● ● ○ Check DRS status on clusters while configuring alerts/events settings ○ Reboot host after performing update or any other configuration action ○ Monitor vCenter tasks status/progress ○ Create vCenter tasks, for example firmware update task, host configuration task, and inventory task ○ Update vCenter task status/progress ○ Get host profiles ○ Add host to data center ○ Add host to cluster ○ Apply profile to host ○ Get CIM credentials ○ Configure hosts for compliance ○ Get the compliance ta
3 Steps to Configure or Edit the OpenManage Integration for VMware vCenter After you complete the basic installation of the OpenManage Integration for VMware vCenter, you can proceed to configure the appliance using one of the following methods described later in this section: ● Configuration Tasks Using the Configuration Wizard ● Configuration Tasks Using the Settings Options The user interface in both methods is similar except in the wizard you click Save and Continue, whereas in the Settings options you
OpenManage Integration for VMware vCenter Home Page When you log into the OpenManage Integration for VMware vCenter home page, the navigation buttons are in the left pane, and the right pane provides useful links and information. This design provides key links into the tasks you do most often. While all these tasks are found under the left-pane navigation, you can also find them on the Overview page for ease of use.
2. In the Profile Name and Description panel, enter the profile name, and a description that is optional that are used to help manage custom connection profiles, and then click Next. 3. In the Associated Hosts section, select the hosts to be associated with the Connection Profile, and then click Next. 4. View the information about credentials and connection protocols and click Next. 5. In the iDRAC panel, type the iDRAC credential information. a.
Setting Up A Proxy Server [Wizard] Set the proxy server in the Configuration Wizard or later using the Dell Management Center, Settings > Proxy page. To set up a proxy server: 1. In Configure HTTP Proxy, do one of the following: ● To not use a proxy server, click Save and Continue. ● To use a proxy server, under Settings enter a Proxy Server Address. 2. Enter the Proxy Port number. 3. Select the Credentials Required check box, if needed. 4. If you selected Credentials Required, do the following: a.
NOTE: OMIVV connects to internet to fetch the warranty information of your hosts. Depending on your network settings, you might have to configure proxy for the warranty job to run successfully. Configuring the Deployment Credentials [Wizard] Deployment credentials are used to communicate securely with a bare-metal system that is discovered using AutoDiscovery. For secure communication with iDRAC, OMIVV uses deployment credentials from initial discovery until the end of the deployment process.
3. To save this selection and continue the Configuration Wizard, click Save and Continue. Enabling The OMSA Link [Wizard] To launch OMSA within the OMIVV virtual appliance, the OMSA Web Server must be installed and configured. See Dell OpenManage Server Administrator Installation Guide for instructions on how to install and configure the Web Server. NOTE: OMSA is only required on Dell servers prior to 12 th Generation.
● Enable or Disable Warranty Expiration Notification. You can perform the following tasks: You can perform the following tasks: ● General: Set the OMSA URL that displays on the Dell Hosts tab in vCenter. You can also enable or disable Warranty Expiration Notification. ● Events And Alarms: Enables or disables all hardware alarms (current alert status is displayed on the Alarms tab). Also configures incoming event and alert filtering.
4. To set the Minimum Days Threshold Alert do the following: a. To set warnings, in the Warnings drop-down list select the number of days for warnings about server warranty status. b. To set critical warranty status, in the Critical drop-down list set the number of days for warning of critical server warranty status. 5. To apply the changes, click Apply. Creating A New Connection Profile A connection profile stores the credentials that the virtual appliance uses to communicate with Dell servers.
● For hosts already configured and enabled for Active Directory on which you want to use Active Directory, select the Use Active Directory check box; otherwise skip down to configure your Host Credentials. ○ In the Active Directory User Name text box, type the user name. Type the username in one of these formats: domain\username or domain/username or username@domain. The user name is limited to 256 characters. Refer to Microsoft Active Directory documentation for user name restrictions.
5. To restore the default vCenter alarm settings for all managed Dell servers, click Restore Default Alarms. It may take up to a minute before the change takes effect. 6. To save, click Save.
3. Navigate to the Host and Cluster view, click on any Dell host, then click the OpenManage Integration tab. The following info should be available: ● ● ● ● ● ● Overview Page System Event Log Hardware Inventory Storage Firmware Power Monitoring NOTE: Inventory job for hosts exceeding the license limit will be skipped and marked as Failed.
The password should be 20 characters or less (only ASCII printable characters). ● In the Verify Password text box, enter the password again. The passwords must match. 3. Click Apply. Setting Up The Firmware Repository To set up the firmware repository and credentials: 1. In the OpenManage Integration for VMware vCenter , select Settings > Firmware Repository and then click Edit. 2.
Adding Deployable Servers To A White List For information about security settings for deployable servers, see Server Security Settings For Deployment. When enforced, only Dell servers on the Server White List are available for deployment using the OpenManage Integration for VMware vCenter. You can add deployable servers to a white list manually or import using a list. To add deployable servers to a white list: 1. In the Dell Management Center, in the left pane, select Settings > Security. 2.
CAUTION: Hosts in Lockdown Mode will not appear in compliance checks even if they are non-compliant. They do not display because their compliance status cannot be determined. Make sure to check the compliance of these systems manually. When this is the case a warning displays.
Running The Fix Non-Compliant Bare Metal Server Wizard Run the Fix Non-Compliant Bare Metal Server Wizard to fix non-compliant bare metal servers. For information about compliance, see About Host And Bare Metal Compliance Issues. To run the Fix Non-Compliant Bare Metal Server Wizard: 1. In the Dell Management Center, in the left pane, click Compliance > Bare Metal Servers. 2. In the Bare Metal Servers window, view the non-compliant hosts, then click Fix Non-Compliant Bare Metal Servers. 3.
● Upgrading From Trial Version To Full Product Version NOTE: Perform an appliance backup before you begin the upgrade. See Performing An Immediate Backup. Upgrading From a Trial Version To a Full Product Version To upgrade from trial version to a full product versions: 1. Go to the Dell Website and purchase the full product version.
4 End-To-End Hardware Management The goal of end-to-end hardware management is to provide the system health status and up-to-date infrastructure information that an administrator needs to respond to critical hardware events without leaving the Dell Management Center or vCenter.
Table 2. Event Posting Level Descriptions (continued) Post only Critical and Warning Events Posts only events with either Critical or Warning criticality into related vCenters. Post only Virtualization-Related Critical and Warning Events Post Virtualization related events received from hosts into related vCenters. Virtualization related events are those that Dell has selected to be most critical to hosts running virtual machines. When you configure your events and alarms, you can enable them.
Integration for VMware vCenter. Details on manually installing the agents are at http://en.community.dell.com/ techcenter/systems-management/w/wiki/1760.openmanage-server-administrator-omsa.aspx. 1. If not already installed, install the vSphere command line tool (vSphere CLI) from http://www.vmware.com. 2. Enter the following command: Vihostupdate.pl -server -i -b NOTE: It can take a few minutes for OMSA to install.
● Hypervisor, BIOS firmware, and iDRAC firmware versions. ● Ten most recent system event log entries. Click Details to launch the System Event Log window that displays additional log details. Host Information In the left pane of the Host Overview, you can find the links to the following types of Host information: ● System Event Log Displays hardware system event log information. See Understanding System Event Logs.
● Click Remote Access Console to launch the Integrated Dell Remote Access Controller (iDRAC) Web user interface. ● Click OMSA Console to launch the OpenManage Server Administrator (OMSA) user interface if it has been configured. See Enabling The OMSA Link ● Click Blade Chassis Console to launch the Chassis Management Controller (CMC) Web user interface. Resetting iDRAC iDRAC sometimes might not response to the requests coming from the OpenManage Integration for VMware vCenter.
To modify the inventory job schedule: 1. From the Dell Management Center, select Settings > Inventory Schedule. 2. To change the current schedule, click Edit. 3. Select the On Selected Days option button, and then select the check box for the day of the week and enter the time. Click Clear to clear the entries. 4. To change the inventory schedule, click Apply, or to cancel the inventory schedule, click Cancel. 5. To run the job now, from the management center, select Job Queue and the Inventory History tab.
● Host system total storage, unconfigured, configured, and global hot spare disk capacity. ● List of how many of each storage component is present in the system. ● Component data table that contains detailed information on that component. 6. Under Host Information, click Firmware to display all Dell Lifecycle Controller firmware information including: ● Update name - BIOS, Dell Lifecycle Controller, power supply, and so on. ● Update type - BIOS, firmware, or application.
3. In the Storage page, view the graphical summary or use the table and View and Filter drop-down lists to sort your inventory information. Viewing Host Power Monitoring The host system power monitoring provides general power information, energy statistics, and reserve power information, including: ● Current power budget, profile, warning and failure thresholds ● Energy consumption, system peak power, and amperage statistics ● Reserve power and peak reserve capacity To view host power monitoring: 1.
● ● ● ● ● Creating A Connection Profile Viewing And Editing An Existing Connection Profile Deleting A Connection Profile Testing A Connection Profile Refreshing A Connection Profile Viewing Or Editing An Existing Connection Profile After you have configured a connection profile, you can edit the profile name, description, associated hosts, and iDRAC and OMSA Agent credentials. To view or edit an existing connection profile: 1. From the OpenManage Integration for VMware vCenter, select Connection Profiles.
○ In the Active Directory Password text box, type the password. The password is limited to 127 characters. ○ In the Verify Password text box, type the password again. ○ In the Certificate Check drop-down list, select one of the following: ■ To download and store the Host certificate and validate it during all future connections, select Enable . ■ To perform no check and not store the Host certificate, select Disabled.
Understanding System Event Logs In vSphere Client Host View The System Event Log provides status information for hardware discovered by the OpenManage Integration for VMware vCenter. System Event Logs provide information based on the following criteria: Status There are several status icons: Informational (blue exclamation point), Warning (yellow triangle with exclamation point), Error (red X). Time (Server Time) Indicates the time and date the event occurred.
Displays the time and date the event occurred. ● Search this page Displays the specific message, server names, configuration settings, and so on. To display the system event log for an individual host: 1. From the vSphere Client, under the Inventory heading select Hosts and Clusters. 2. In the tree view, select the host system. 3. Select the OpenManage Integration tab. 4. From Recent System Log Entries, to launch the System Event Log window, click Details. 5.
1. In vSphere Client > OpenManage Integration tab > Host Information, click Firmware > Run Firmware Update Wizard. 2. To use the Load a single firmware update from a file option: a. Enter the file path in the following format: CIFS: \\\.exe or NFS: host:/share/filename.exe b. If you have NFS, skip to step 7 or enter the User Name and Password in a domain format that has access to the share drive. c. Continue to step 7.
4. The Success dialog box tells you that an update is now in progress. If you chose to Exit maintenance mode after firmware update completes, the firmware update puts the host into maintenance mode and then reboots automatically. Otherwise, it stays in maintenance mode. 5. Refer to the Recent Tasks area of the vSphere Client to watch the update progress. After this procedure, run the Firmware Update Wizard again to make sure your firmware is completely updated.
NOTE: Selecting an option is mandatory. If one is not selected, the upgrade is blocked. ● If you want to run the update job now, click Update Now, and then click Finish. ● If you want to run the update job later, click Schedule Update, and then do the following: a. In the Calendar box, select the month and day. b. In the Time text box, type the time in HH:MM, and then click Finish. NOTE: The time is the local timezone where your client is physically located. Invalid time values result in a blocked update.
are initiated from the OpenManage Integration tab in vCenter or by right-clicking the host in Host & Clusters view for an individual host system. Setting Up Physical Server Front Indicator Light To assist in locating a physical server in a large datacenter environment, you can set the front indicator light to blink for a set time period. To set up a physical server's front indicator light: 1. In vSphere Client, under the Inventory heading, select Hosts and Clusters. 2.
5. To refresh the displayed inventory, click Refresh. 6. To export the inventory as a CSV file, click Export. In the Download Location window, browse to the location to save the inventory and click Save. Viewing Server Warranty Information For A Single Host Once a warranty job completes you can view the warranty information for a single host in vSphere Client on the Hosts View page. To view the server warranty information for a single host: 1.
5 Hardware Management Prerequisites: To successfully perform hardware provisioning and deployment, the physical servers must appear in the Deployment Wizard. All physical servers must meet the following prerequisites: ● See the OpenManage Integration for VMware vCenter Release Notes for specific hardware support information. ● The server must have the minimum supported versions of iDRAC firmware, Lifecycle controller and BIOS.
• • • • • About Managing Hardware Profiles Creating A New Hypervisor Profile Managing Hypervisor Profiles Building A New Deployment Template Running The Deployment Wizard Provisioning Overview Once a physical inventory of the datacenter is complete, all auto-discovered bare-metal systems are available to the OpenManage Integration for VMware vCenter for zero touch hardware provisioning and hypervisor deployment.
Downloading Custom Dell ISO Images Custom ESXi images that contain all Dell drivers are required for deployment. NOTE: The OpenManage Integration for VMware vCenter ISO does not contain the required ESXi ISO images for deployment. You must download these images to a location that is accessible during deployment or your deployment may fail. 1. Navigate to support.dell.com. 2.
System Inventory On Reboot (CSIOR) setting enabled and be rebooted to provide accurate inventory and configuration information. The tasks for creating hardware profiles include: ● Enabling CSIOR On A Reference Server ● Creating A New Hardware Profile ● Cloning A Hardware Profile on page 52 ● About Managing Hardware Profiles Creating A New Hardware Profile To create a new hardware profile: 1. In the Dell Management Center, select Deployment > Deployment Templates > Hardware Profiles. 2. Click Create New. 3.
● Power Management ● System Security ● Miscellaneous Settings Once all updates are made for a category, click Apply to save the changes or click Cancel to cancel the changes. NOTE: For detailed BIOS information, including setting options and explanations, refer to the Hardware Owner’s Manual for the selected server. 15. In the left pane, select iDRAC Settings and then select Network. 16.
Cloning A Hardware Profile To clone a new hardware profile: 1. In the Dell Management Center, select Deployment > Deployment Templates > Hardware Profiles. 2. Click Create New. 3. In the New Hardware Profile page, do the following: ● In the Profile Name text box, enter the profile name ● In the Description text box, enter an optional description. 4. Click Save. 5. In the left pane, click Reference Server. 6. In the Reference Server window, click Edit. 7.
Deleting Hardware Profiles To delete a hardware profile: NOTE: Deleting a hardware profile that is part of a running deployment task can cause the task to fail. 1. In the Dell Management Center, select Deployment > Deployment Templates > Hardware Profiles. 2. Select a profile and click Delete. 3. In the message dialog box, to remove the profile click Delete , or click Cancel to cancel. Refreshing Hardware Profiles To refresh an updated hardware profile: 1.
● vCenter Host Profile: Select a profile that encapsulates host configuration and helps to manage host configuration. 8. To add the information to the profile, click Save. For information on Managing Hypervisor Profiles, see Managing Hypervisor Profiles.
In this example network, the OpenManage Integration for VMware vCenter is on VLAN 5, while the vCenter and the VMkernal of the ESXi hosts being deployed are on VLAN 10. Because the OpenManage Integration for VMware vCenter does not support multi-VLAN homing, VLAN 5 must route to VLAN 10 for all systems to communicate to each other correctly. If routing is not enabled between these VLANs, then the deployment fails. Viewing Or Editing Hypervisor Profiles To view or edit hypervisor profiles: 1.
1. In the Dell Management Center, select Deployment > Deployment Templates. 2. Under Available Profiles, click Create New. 3. In the Create New window, enter a name for the template, and then click Save. 4. To complete the template, click Edit. 5. In the right pane, in the Profile drop-down list, choose a profile, and then do one of the following: ● To display the hardware/hypervisor profile settings for the selected profile, click View. ● To create a new hardware/hypervisor profile, click Create New. 6.
● ● ● ● ● Setting up global settings. This page lets you choose to deploy hypervisor to a hard disk or Internal Dual SD Module. Assigning identification to the deployed servers. Matching a desired connection profile to each server. Scheduling the server deployment jobs to run. Displaying the Job Queue where you can manage deployment jobs.
● Hard Disk — Deploys the hypervisor on the hard disk drive. ● Internal Dual SD Module — Deploys the hypervisor on the Internal Dual SD Module. 2.
To create a connection profile: 1. Connection Profile automatically assigns servers to connection profiles after the deployment job completes. Once a connection profile is selected, click Next. 2. Select the Assign all servers to the same connection profile option button, and select the connection profile from the drop-down list to assign all servers to the same existing profile. 3. To create a new profile, click New and to view or edit the selected profile click View/Edit. 4.
Managing Deployment Jobs Using The Deployment Job Queue To manage deployment jobs using the deployment job queue: 1. From the Dell Management Center, select Job Queue > Deployment Jobs. 2. To update Deployment Jobs Details, click Refresh. 3. To display a Deployment Job Details dialog, which contains detailed information on the servers included in the deployment job, click Details.
6 Console Administration Administration of the OpenManage Integration for VMware vCenter and its virtual environment is achieved by using two additional administration portals: ● Web-based Administration Console ● Console view for an individual server (the appliance virtual machine console).
2. After you define a role and select privileges for the role, assign a user to the newly created role. See VMware vSphere documentation for more information on assigning permissions in the vSphere client. A vCenter server non-administrator user with the required privileges can now register and/or unregister vCenter, modify credentials, or update the certificate. NOTE: The vCenter administrator should assign permissions in the vSphere client. 3.
Registering a vCenter server by a non-administrator user with the required privileges You can register a vCenter server for the OMIVV appliance by using a non-administrator user with the required privileges. See Registering a vCenter Server on page 63 for more information on registering a vCenter server. Assigning Dell privileges to the role You can edit an existing role to assign the Dell privileges. NOTE: Ensure that you are logged in as a user with Administrator privileges.
5. Click Register. NOTE: For all vCenter operations, OMIVV uses the privileges of the registered user and not the privileges of the logged-in user. For example: Suppose, a user X with the necessary privileges registers OMIVV with vCenter and user Y has only Dell privileges. The user Y can now log in to the vCenter and can trigger a firmware update task from OMIVV. While performing the firmware update task, OMIVV uses the privileges of user X to put the host into maintenance mode or reboot the host.
Table 5. Supported vCenter Server versions for release 3.1 (continued) vCenter version Desktop client support Web client support v5.5 U3 Y Y v6.0 Y Y v6.0 U1 Y Y Modifying the vCenter Login The vCenter login credentials can be modified by a user with administrative privileges or a non-administrator user with necessary privileges. 1. In OpenManage Integration for VMware vCenter, on the Summary tab, use the link to open the Administration Console. 2. In the Login dialog box, type your password. 3.
4. To navigate to the license file, click the Browse button, to navigate to the license file, and then click Upload. NOTE: If the license file is modified or edited in any way, the appliance views it as corrupted and the file will not work. NOTE: You can add licenses if you need to add more hosts. Follow the process mentioned above to add more licenses. NOTE: If the number of successfully inventoried 11th, 12th, and 13th generation servers equals the number of purchased licenses.
1. Launch a web Browser then enter https://. 2. In the left pane, click APPLIANCE MANAGEMENT. 3. To update the virtual appliance to the software version listed under Appliance Update, click Update Virtual Appliance. 4. In the Update Appliance dialog box, the current and available versions are listed. To begin the update, click Update. 5. The system is locked down and put into maintenance mode. When the update is complete, the Appliance page displays showing the newly installed version.
Generating a new Certificate Signing Request prevents certificates that are created with the previously generated CSR from being uploaded to the appliance. 1. In OpenManage Integration for VMware vCenter, under Administration Console, use the link to open the Administration Console. 2. In the Login dialog box, type your password. 3. In the left pane, click APPLIANCE MANAGEMENT. 4. Click Generate Certificate Signing Request for HTTPS Certificates.
● Timeout for duplicate alerts (seconds) 5. To save your settings, click Apply, or click Cancel to cancel. Managing Backup And Restore Managing backup and restore is accomplished from the Administrative Console.
Performing An Immediate Backup 1. In OpenManage Integration for VMware vCenter, under Administration Console, use the link to open the Administration Console. 2. In the Login dialog box, type your password. 3. In the left pane, click BACKUP AND RESTORE. 4. Click Backup Now. 5. To use location and encryption password from the Backup settings, in the Backup Now dialog box, select that check box. 6. Enter a Backup Location, User Name, Password, and Encryption Password.
Configuring Network Settings Changes to the network settings are done in the vSphere Client Console. 1. In vSphere Web Client, in the Navigator, select vCenter. 2. In the Navigator, select the Virtual Machine that you want to manage. 3. Do one of the following: ● On the Object tab, select Action > Open Console. ● Right-click the virtual machine that you selected and select Open Console. 4. In the Console window, select Configure Network, then press . 5.
Resetting The Virtual Appliance To Factory Settings To reset the virtual appliance to factory settings: 1. In vSphere Client, select the OpenManage Integration for VMware vCenter virtual machine, and click the Console tab. 2. Select Reset this Virtual Appliance to Factory Settings and press . 3. The following notice is displayed: This operation is completely Irreversible if you continue you will completely reset *this* appliance to its original settings.
7. In the UPDATE APPLIANCE dialog box, click Update. After you click Update, you are logged off the ADMINISTRATION CONSOLE window. NOTE: While upgrading OMIVV from 3.0 to the current version, the custom certificate is not migrated and you must reapply the settings that you had applied for the certificate. Migration Path to migrate from 2.x to 3.1 Do the following to migrate from older version to the OMIVV 3.1 version: 1. Take a backup of the database for the older release. 2.
7 Troubleshooting Use this section to find answers to troubleshooting questions. This section includes: ● Frequently asked questions (FAQ) ● Bare metal deployment issues ● Contacting Dell on page 86 ● Related product information Topics: • • • • Frequently Asked Questions (FAQ) Bare Metal Deployment Issues Contacting Dell OpenManage Integration for VMware vCenter Related Information Frequently Asked Questions (FAQ) This section contains some common questions and solutions.
Dell Management Center does not display all the relevant logs when trying to filter a severity category. How can I view all the logs? When you select a severity category to filter the log data by choosing All Categories from the drop-down, all the logs belonging to specific category are displayed accurately. However, if you filter by choosing Info from the drop-down, the Firmware update logs are not displayed and only the task initiation logs are displayed.
OMIVV version for is not updated from About Screen after the Appliance is updated This is a known issue with the Internet Explorer where it is still using the old cache values. Clearing the IE's cache would show the correct version. Using OpenManage Integration for VMware vCenter to update an Intel Network card with the firmware version of 13.5.2 is not supported. There is a known issue with Dell PowerEdge 12th generation servers and some Intel Network cards with the firmware version of 13.5.2.
Administration Portal is still showing the unreachable Update Repository location. If the user provided a unreachable Update Repository path, the error message “Failed: Error while connecting to the URL …. ” is displayed on the top of the Appliance Update view, however the Update Repository Path is not cleared out to the value before update. Resolution: Move out of this page to another page and make sure the page is refreshed.
How Come I See An Error Message Displayed After Clicking The Firmware Link? If you have a slow network speed (9600BPS), you may get a Communication Error Message. This error message may display when you click the Firmware link in the vSphere Client for the OpenManage Integration for VMware vCenter. It happens when the connection times out while trying to obtain the Software Inventory list. Microsoft Internet Explorer initiates this timeout.
Does OpenManage Integration for VMware vCenter support vCenter in linked mode? Yes , OpenManage Integration for VMware vCenter supports up to 10 vCenters either in a linked mode or not in a linked mode also. For more information on how OpenManage Integration for VMware vCenter works in linked mode, see the white paper, OpenManage Integration for VMware vCenter: Working in Linked Mode on www.Dell.com.
Table 7. Managed Nodes (continued) Port Number Protocols Port Type Max.
the same user with new changed credentials in the iDRAC user list? The password of the user used from discovery is not changed to the new credential if only hardware profile template is selected for deployment. This is done intentionally so that the plugin is able to communicate with the iDRAC future use in deployment needs.
12. Select Apply Changes, and the temperature warning event is generated. To cause another event, restore the original settings using the same Set to Values option. Events are generated as warnings, and then to a normal state. If everything is working properly, navigate to the vCenter Tasks & Events view; a temperature probe warning event should be displayed. NOTE: There is a filter for duplicate events; if you try to trigger the same event too many times in a row, you will only receive one event.
I Am Using A Reference Server to Create a Hardware Profile But it Failed. What Should I Do? Check to make sure that minimum recommended versions of iDRAC firmware, Lifecycle Controller firmware, and BIOS are installed. To make sure that the data retrieved from the reference server is current, enable Collect System Inventory On Restart (CSIOR), and restart the reference server prior to extraction of data. See Setting CSIOR on a Reference Server.
8. Turn off the OpenManage Integration for VMware vCenter virtual appliance and delete it. Entering a Password in the Backup Now Screen Receives an Error Message If you are using a low resolution monitor, the Encryption Password field is not visible from the BACKUP NOW window. You must scroll down the page to enter the encryption password. My Firmware Update Failed. What Do I Do? Check the virtual appliance logs to see if the tasks timed out. If so, iDRAC needs to be reset by performing a cold reboot.
In the Administration Console, why the Update Repository Path is not set to default path after I reset the appliance to factory settings? After you reset the appliance, go to the Administration Console, and then click APPLIANCE MANAGEMENT in the left pane. In the Appliance Settings page, the Update Repository Path is not changed to default path. Resolution: In the Administration Console, manually copy the path in the Default Update Repository field to Update Repository Path field.
Contacting Dell NOTE: If you do not have an active Internet connection, you can find contact information on your purchase invoice, packing slip, bill, or Dell product catalog. Dell provides several online and telephone-based support and service options. Availability varies by country and product, and some services may not be available in your area. To contact Dell for sales, technical support, or customer service issues: 1. Go to dell.com/support 2. Select your support category. 3.
8 Virtualization-related Events For Dell PowerEdge Servers The following table contains virtualization-related critical and warning events, including event name, description and severity level for 11th, 12th, and 13th generation of PowerEdge servers. Table 8.
Table 8. Virtualization-related Events of 11th, 12th, and 13th Generation PowerEdge Servers (continued) Event Name Description Severity Recommended action Dell - Memory Device error A memory device correction rate exceeded an acceptable value, a memory spare bank was activated, or a multibit ECC error occurred. Error Put the system into maintenance mode Dell - Fan enclosure inserted into system Sensor returned to normal value.
Table 8. Virtualization-related Events of 11th, 12th, and 13th Generation PowerEdge Servers (continued) Event Name Description Severity Recommended action Dell - Battery sensor detected A battery sensor in the a failure value specified system detected that a battery has failed. Error No action Dell - Battery sensor detected A battery sensor in the a nonrecoverable value specified system detected that a battery has failed.
Table 8. Virtualization-related Events of 11th, 12th, and 13th Generation PowerEdge Servers (continued) Event Name Description Severity Recommended action Dell - Voltage sensor detected A voltage sensor in the a warning value specified system exceeded its warning threshold Warning No action Dell - Voltage sensor detected A voltage sensor in the a failure value specified system exceeded its failure threshold.
Table 8. Virtualization-related Events of 11th, 12th, and 13th Generation PowerEdge Servers (continued) Event Name Description Severity Recommended action Dell - Storage: Temperature probe information Temperature probe information Info No action Dell - Storage: Array disk warning Array disk warning. Warning No action Dell - Storage: Array disk information Array disk information. Info No action Dell - Storage: Power supply warning Power supply warning.
Table 8.
Table 8. Virtualization-related Events of 11th, 12th, and 13th Generation PowerEdge Servers (continued) Event Name Description Severity Dell - A warning event was detected for a PCI device A warning event was detected Warning for a PCI device Recommended action No Action Dell - An informational event An informational event was was detected for a PCI device detected for a PCI device Info No Action Dell - Virtual Disk Partition failure. Virtual Disk Partition failure.
Table 8. Virtualization-related Events of 11th, 12th, and 13th Generation PowerEdge Servers (continued) Event Name Description Severity Recommended action Dell - Power usage audit warning. Power usage audit warning. Warning No Action Dell - Security configuration warning. Security configuration warning. Warning No Action Dell - Configuration: Software configuration warning. Configuration: Software configuration warning.
A Topics: • Understanding Auto-Discovery Understanding Auto-Discovery Auto-Discovery is the process of adding a 11th, 12th, or 13th generation of Dell PowerEdge bare-metal server into a pool of available servers for use by the OpenManage Integration for VMware vCenter. Once a server is discovered, use it for hypervisor and hardware deployment. This appendix provides sufficient information about Auto-Discovery to help you with system configuration.
● Additional network settings: If using DHCP, enable the Get DNS server address from DHCP setting so that DNS name resolution can occur. ● Provisioning service location: The iDRAC must know the IP address or host name of the provisioning service server. ● Account access disabled: Enable the administrative account access to the iDRAC and if there are any iDRAC accounts with administrator privileges, first disable them from within the iDRAC web console.
Figure 6. Press CTRL+E to activate this screen. 3. In the iDRAC6 Configuration Utility, use the arrow keys to select LAN User Configuration. 4. Use the arrow keys to select Auto-Discovery. 5. Use the space bar to toggle the option to Enabled. 6. Use the arrow keys to select Provisioning Server and press Enter. 7. Enter the IP address of the OMIVV appliance. 8. Press ESC. 9. Use arrow keys to select Account Access. 10. Use the space bar to toggle the option to Disabled. 11. From your keyboard, press ESC. 12.
4. Set the Enable Auto-Discovery as Enabled and set Provisioning Server as the IP address of the OMIVV. 5. Save the settings. 6. The server is auto discovered upon next server boot. After successful Auto-Discovery, the root user gets enabled, and the Enable Auto-Discovery flag gets disabled automatically.