
Setup Guide


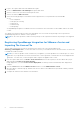
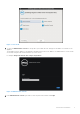
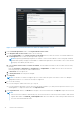
Table Of Contents
- OpenManage Integration for VMware vCenter Quick Installation Guide for vSphere Web Client Version 3.1
- Quick Start Installation
- Installation Introduction
- Prerequisites
- Hardware Requirements
- Software Requirements
- Installation and Configuration Overview
- Deploying the OMIVV OVF Using the vSphere Web Client
- Registering a vCenter server by using a user with necessary privileges
- Registering OpenManage Integration for VMware vCenter and Importing The License File
- Installation Verification
- Upgrading OpenManage Integration Plugin from 3.0 version to the current version
- Migration Path to migrate from 2.x to 3.1
- Recover OpenManage Integration for VMware vCenter if the older plug-in is unregistered
- Understanding How to Configure or Edit the OpenManage Integration for VMware vCenter
- Additional Configuration Settings
- Licensing in OpenManage Integration for VMware vCenter
- Related documentation and resources

1. Log in to the vSphere Web client with administrative rights.
2. Browse to Administration → Role Manager in vSphere Web client.
3. Select a vCenter server system from the drop-down menu.
4. Select a role and click Edit role action.
5. Select the following privileges for Dell Infrastructure Deployment Role, Dell Operational Role, and click OK.
● Dell
○ Dell.Configuration
○ Dell.Deploy-Provisioning
○ Dell.Inventory
○ Dell.Monitoring
○ Dell.Reporting
See OpenManage Integration for VMware vCenter User's Guide for more information on the available OMIVV roles within
vCenter.
The changes to permissions and roles take effect immediately. The user with necessary privileges can now perform the
OpenManage Integration for VMware vCenter operations.
NOTE: For all vCenter operations, OMIVV uses the privileges of the registered user and not the privileges of the logged-in
user.
Registering OpenManage Integration for VMware vCenter and
Importing The License File
This procedure assumes that you have received the licenses in the form of an e-mail attachment from
download_software@dell.com. If you have more than one license, you can add the licenses one after another. The license file
is available as an XML format file.
NOTE:
If you want to upload a custom certificate for your appliance, you must upload the new certificate prior to vCenter
registration. If you upload the new custom certificate after vCenter registration, communication errors are displayed in the
Web client. To fix this issue, you must unregister and re-register the appliance with vCenter.
1. From the vSphere Web Client, click Home > Hosts and Clusters, then in the left panel, locate the OMIVV that you just
deployed, and click Power on the virtual machine.
During deployment, if you select Power on after Deployment, the VM is powered on automatically after deployment is
complete.
2. Click the Console tab in the main VMware vCenter window to run the Administration Console.
3. Allow the OMIVV to finish booting up, and then enter the user name for the administrator (the default is Admin), and then
set a password.
4. Configure the OMIVV network and time zone information.
8
Quick Start Installation