
Install Guide

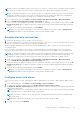
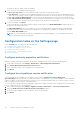
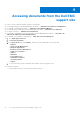

Table Of Contents
- OpenManage Integration for VMware vCenter Version 5.0 Installation Guide
- Introduction
- Install and configure OMIVV
- Download OpenManage Integration for VMware vCenter
- Deploy OMIVV OVF using vSphere Client (HTML-5)
- Configure OMIVV appliance
- Set up Network Time Protocol servers
- Configure OMIVV appliance with two network adapters
- Generate a Certificate Signing Request (CSR)
- Upload HTTPS certificate
- Register OpenManage Integration for VMware vCenter and import license file
- Register vCenter server by non-administrator user
- Reconfigure OMIVV after upgrading registered vCenter version
- Verify installation
- Manage backup and restore
- Update OMIVV appliance and repository location
- Upgrade OMIVV appliance using RPM
- Upgrade OMIVV appliance using backup and restore
- Unregister OpenManage Integration for VMware vCenter
- Recover OMIVV after un-registration
- Configure appliance for VMware vCenter
- Accessing documents from the Dell EMC support site
- Related Documentation

Configure deployment credentials
OMIVV acts as a provisioning server. The deployment credentials enable you to communicate with iDRAC that uses the OMIVV
plugin as a provisioning server in the auto discovery process. The deployment credentials enable you to set up iDRAC credentials
to communicate securely with a bare-metal server that is discovered using auto discovery until the OS deployment is complete.
After the OS deployment process is successfully complete, OMIVV changes the iDRAC credentials as provided in the host
credential profile. If you change the deployment credentials, all newly discovered systems using auto discovery are provisioned
with the new iDRAC credentials from that point onwards. However, the credentials on servers that are discovered before the
change of deployment credentials are not affected by this change.
1. On the OMIVV home page, click Settings > Appliance Settings > Deployment Credentials.
2. Enter the user name and password. The default user name is root and password is calvin.
Ensure that you provide only the iDRAC supported characters and iDRAC local credentials.
3. Click APPLY.
Override severity of health update notification
You can configure to override the existing severity of the Dell Proactive HA events for the Dell EMC host and its components
with customized severity, which is aligned to your environment.
The following are the severity levels that apply to each of the Proactive HA events:
● Info
● Moderately Degraded
● Severely Degraded
NOTE: You cannot customize the severity of the Proactive HA components with the Info severity level.
1. In OpenManage Integration for VMware vCenter, click Settings > Applinace Settings > Override Severity for Proactive
HA.
The data grid displays all the supported Proactive HA events and includes columns; events id, event description, component
type, default severity, and override severity column for customizing the severity of the host and its components.
2. To change severity of a host or its component, in the Override Severity column, select the required status from the
drop-down list.
This policy applies to all the Proactive HA hosts across all vCenter servers that are registered with OMIVV.
3. Repeat step 2 for all the events that must be customized.
4. Perform any one of the following actions:
a. To save the customization, click APPLY.
b. To cancel the override severity settings, click CANCEL.
To reset the override severity settings to default, click RESET TO DEFAULT.
Configure appliance for VMware vCenter
41