
Install Guide
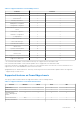
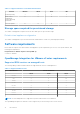

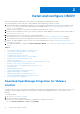

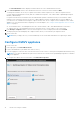
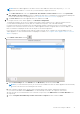
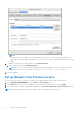
Table Of Contents
- OpenManage Integration for VMware vCenter Version 5.0 Installation Guide
- Introduction
- Install and configure OMIVV
- Download OpenManage Integration for VMware vCenter
- Deploy OMIVV OVF using vSphere Client (HTML-5)
- Configure OMIVV appliance
- Set up Network Time Protocol servers
- Configure OMIVV appliance with two network adapters
- Generate a Certificate Signing Request (CSR)
- Upload HTTPS certificate
- Register OpenManage Integration for VMware vCenter and import license file
- Register vCenter server by non-administrator user
- Reconfigure OMIVV after upgrading registered vCenter version
- Verify installation
- Manage backup and restore
- Update OMIVV appliance and repository location
- Upgrade OMIVV appliance using RPM
- Upgrade OMIVV appliance using backup and restore
- Unregister OpenManage Integration for VMware vCenter
- Recover OMIVV after un-registration
- Configure appliance for VMware vCenter
- Accessing documents from the Dell EMC support site
- Related Documentation

The Select Networks window displays information about the source and destination networks.
11. In the Select Networks window, select destination network for each source network and click Next.
To manage the Dell EMC servers in your vSphere environment, OMIVV requires access to both the vSphere network
(vCenter and ESXi management network) and out-of-band network (iDRAC, CMC, and Dell EMC OpenManage Enterprise
Modular (OME-Modular).
If vSphere network and out-of-band network are maintained as separate isolated network in your environment, OMIVV
requires access for both the networks. In this case, OMIVV appliance must be configured with two network adapters. If
you can access out-of-band network using the vSphere network, then, do not configure a network adapter for the OMIVV
appliance. For more information about configuring two network adapters, see Configure OMIVV appliance with two network
adapters on page 21.
● Out-of-band network—The management network to which an iDRAC, CMC, and OME-Modular are connected to.
● vSphere network—The management network to which ESXi hosts, vCenters, and PSCs are connected to.
12. In the Ready to Complete window, review the selected options for the OVF deployment task and click Finish.
The deployment job runs and displays the completion status where you can track the job completion status.
13. Power on the VM.
NOTE: After you deploy an OVF, you must mandatorily set the current date and time before registering to OMIVV.
Configure OMIVV appliance
1. Power on the VM.
2. In the right-pane, click Launch Web Console.
3. Log in as an administrator (the default user name is admin).
4. If you are logging in for the first time, follow the instructions on the screen to set the password (Admin and ReadOnly users).
NOTE:
If you forget the administrator password, it cannot be recovered from the OpenManage Integration for VMware
vCenter appliance.
5. To configure the OMIVV time zone information, click Date/Time Properties.
18
Install and configure OMIVV