
Setup Guide


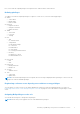
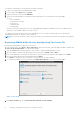
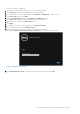

Table Of Contents
- OpenManage Integration for VMware vCenter Quick Install Guide for vSphere Desktop Client Version 3.2
- Installing OpenManage Integration for VMware vCenter
- Installation introduction
- Prerequisites
- Hardware Requirements
- Software Requirements
- Installation and Configuration Overview
- Deploying the OMIVV OVF Using the vSphere Client
- Registering a vCenter server by using a user with necessary privileges
- Registering OMIVV within vCenter And Importing The License File
- Installation Verification
- Upgrading OMIVV from existing version to current version
- Migrating from 2.x to 3.2
- Recovering OMIVV after unregistering earlier version of OMIVV
- Prerequisites
- Installation introduction
- Configuring OpenManage Integration for VMware vCenter
- Configuration Wizard welcome page
- Creating a new Connection Profile [Wizard]
- Configuring Events And Alarms [Wizard]
- Setting Up A Proxy Server [Wizard]
- Scheduling Inventory Jobs [Wizard]
- Running A Warranty Retrieval Job [Wizard]
- Configuring the Deployment Credentials [Wizard]
- Setting The Default Firmware Update Repository [Wizard]
- Enabling The OMSA Link [Wizard]
- Configuring NFS Shares
- OpenManage Integration for VMware vCenter licensing
- More Configuration Information
- Related documentation and resources

The NTP Servers box is displayed.
8. Add valid NTP server details to which your vCenter is synchronized with.
9. Click Time Zone, and select the applicable time zone and click OK.
10. To configure static IP to the OMIVV appliance, click Network Configuration or, skip to step 17.
11. Select Auto eth0, and then click Edit.
12. Select the IPV4 Settings tab and select Manual in the Method drop-down.
13. Click Add and add a valid IP Address Netmask and Gateway information.
14. Add the DNS Server detail in the DNS Servers field.
15. Click Apply.
16. To change the hostname of OMIVV appliance, click Change Hostname.
17. Enter a valid hostname and click Update hostname.
18. Open a Web browser and type the IP address or hostname of the appliance.
For example: https://10.210.126.120 or https://myesxihost. The URL is not case-sensitive.
Figure 2. Administration Console
19. In the Administration Console login window, enter the password, and then click Login.
Installing OpenManage Integration for VMware vCenter
9