OpenManage Integration for VMware vCenter Quick Install Guide for vSphere Desktop Client Version 3.2 April 2017 Rev.
Notes, Cautions, and Warnings NOTE: A NOTE indicates important information that helps you make better use of your computer. CAUTION: A CAUTION indicates either potential damage to hardware or loss of data and tells you how to avoid the problem. NOTE: A WARNING indicates a potential for property damage, personal injury, or death. Copyright © 2017 Dell Inc. or its subsidiaries. All rights reserved. Dell, EMC, and other trademarks are trademarks of Dell Inc. or its subsidiaries.
Contents Chapter 1: Installing OpenManage Integration for VMware vCenter............................................... 4 Installation introduction......................................................................................................................................................4 Prerequisites...................................................................................................................................................................
1 Installing OpenManage Integration for VMware vCenter Topics: • Installation introduction Installation introduction This guide provides step-by-step instructions for installing and configuring the OpenManage Integration for VMware vCenter (OMIVV). Once the installation is complete, see OpenManage Integration for VMware vCenter User's Guide available at dell.
● Supported iDRAC versions (both deployment and management) ● OMSA support for older servers and ESXi version support (both deployment and management). For more information, see OpenManage Integration for VMware vCenter Compatibility Matrix available at dell.com/support/manuals. Software Requirements The vSphere environment must meet virtual appliance, port access, and listening port requirements. VMware vSphere has both a desktop client and Web client.
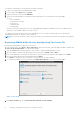
8. In the OVF Template Details window, review the information presented. 9. Click Next. 10. In the Name and Location window, do the following: a. In the Name text box, enter the name of the template. This name can contain up to 80 characters. b. In the Inventory Location list, select a location to store the template. 11. Click Next. 12.
Now, a user with the required privileges can experience the OMIVV features with Dell hosts.
To assign the Dell privileges to an existing role, perform the following: 1. Log in to the vSphere client with administrative rights. 2. On the vSphere client Home page, click Roles. 3. Right-click the role to edit and select Edit Role. 4. Select the following privileges for Dell Infrastructure Deployment Role, Dell Operational Role, and click OK. ● Dell ○ Dell.Configuration ○ Dell.Deploy-Provisioning ○ Dell.Inventory ○ Dell.Monitoring ○ Dell.
The NTP Servers box is displayed. 8. Add valid NTP server details to which your vCenter is synchronized with. 9. Click Time Zone, and select the applicable time zone and click OK. 10. To configure static IP to the OMIVV appliance, click Network Configuration or, skip to step 17. 11. Select Auto eth0, and then click Edit. 12. Select the IPV4 Settings tab and select Manual in the Method drop-down. 13. Click Add and add a valid IP Address Netmask and Gateway information. 14.
Figure 3. vCenter Registration Window from within the Administration Console 20. In the vCenter Registration window, click Register a new vCenter Server. 21. In the Register a New vCenter window, do the following: a. Under vCenter Name, in the vCenter Server IP or Hostname text box, enter the server IP or hostname and then in the Description text box, enter the description, which is optional. b.
Figure 4. The OMIVV Successfully Added to vCenter NOTE: For all vCenter operations, OMIVV uses the privileges of the registered user and not the privileges of the logged-in user. For example: Suppose, a user X with the necessary privileges registers OMIVV with vCenter and user Y has only Dell privileges. The user Y can now log in to the vCenter and can trigger a firmware update task from OMIVV.
7. To apply the update to the virtual appliance, under Appliance Settings, click Update Virtual Appliance. 8. In the UPDATE APPLIANCE dialog box, click Update. After you click Update, you are logged off from the ADMINISTRATION CONSOLE window. 9. Close the web browser. NOTE: Once the RPM upgrade is complete, you can view the login screen in the OMIVV console. Open a browser and provide the following link:https:\\\DellAdminPortal and navigate to the APPLIANCE UPDATE area.
Administrator (OMSA). For more information on fixing the host compliance, see Reporting and fixing compliance for vSphere hosts in OpenManage Integration for VMware vCenter User’s Guide available at Dell.com/support/ manuals.
2 Configuring OpenManage Integration for VMware vCenter After you do the basic installation of the OMIVV, it should be configured. This is typically done using the Configuration Wizard, but you can also do it using the Settings page options in the Dell Management Center. The user interface in both the pane is similar except in the wizard, you Save and Continue, whereas in the Settings options you click Apply. This section tells you how to configure using the wizard.
1. From the Connection Profiles tab, click Create New. 2. In the Profile Name and Description panel, enter the profile name, and a description that is optional that are used to help manage custom connection profiles, and then click Next. 3. In the Associated Hosts section, select the hosts to be associated with the Connection Profile, and then click Next. 4. View the information about credentials and connection protocols and click Next. 5. In the iDRAC panel, type the iDRAC credential information. a.
NOTE: Restoring the OMIVV appliance backup does not restore all the Alarm settings. However, in the OMIVV GUI, the Alarms and Events field displays the restored settings. To resolve this issue, in the OMIVV GUI, in the Manage > Settings tab, manually change the Events and Alarms settings. Setting Up A Proxy Server [Wizard] Set the proxy server in the Configuration Wizard or later using the Dell Management Center, Settings > Proxy page. To set up a proxy server: 1.
The time you enter is your local time. Therefore, if you want to run the inventory at the virtual appliance time zone, calculate the time difference between your local and virtual appliance time zone, and then enter the time appropriately. 3. To apply the changes and continue, click Save and Continue. NOTE: OMIVV connects to internet to fetch the warranty information of your hosts. Depending on your network settings, you might have to configure proxy for the warranty job to run successfully.
NOTE: OMSA is only required on Dell servers prior to 12 th Generation. You can use OMSA to: ● ● ● ● Manage vCenter elements (detailed sensor/component-level health information). Clear command logs and system event logs (SELs). Obtain NIC statistics. Make sure that the OMIVV captures events from a selected host. 1. In the Configuration Wizard, on the OpenManage Server Admin page, use the OMSA Web Server URL text box to enter the OMSA URL. You must include the full URL including the HTTPS. 2.
3 OpenManage Integration for VMware vCenter licensing The OpenManage Integration for VMware vCenter has two types of licenses: ● Evaluation license—when the OMIVV version 3.2 appliance is powered on for the first time, an evaluation license is automatically installed. The trial version contains an evaluation license for five hosts (servers) managed by the OpenManage Integration for VMware vCenter.
NOTE: The license file might be packaged inside a .zip file. Ensure that you unzip the .zip file and upload only the license .xml file. The license file is likely to be named based on your order number, such as 123456789.xml. Options after uploading Licenses License file for new purchases When you place an order for purchasing a new license, an email is sent from Dell about the order confirmation, and you can download the new license file from the Dell Digital store that is available at http://www.dell.
4 More Configuration Information For a complete guide on OMIVV configuration, management, and deployment options, see OpenManage Integration for VMware vCenter User's Guide available at Dell.com/support/manuals.
5 Related documentation and resources In addition to this guide, you can access the other guides available at dell.com/support/manuals. On the Manuals page, click View products under the Choose from all products category. In the All products section, click Software & Security > Virtualization Solutions. Click OpenManage Integration for VMware vCenter 3.