
Users Guide

● Dashboard > Quick References > START INITIAL CONFIGURATION WIZARD
1. On the Welcome page, read the instructions, and then click GET STARTED.
2. On the Select vCenter page, from the vCenters drop-down menu, select a specific vCenter or All Registered vCenters,
and then click NEXT.
NOTE: If you have multiple vCenter servers that are part of the same PSC registered with the same OMIVV appliance,
and if you choose to configure a single vCenter server, repeat step 2 until you configure each vCenter.
3. On the Create Host Credential Profile page, click CREATE HOST CREDENTIAL PROFILE.
For more information about creating a host credential profile, see Create host credential profile on page 38.
After hosts are added to a host credential profile, the IP address of OMIVV is automatically set as SNMP trap destination for
host's iDRAC. OMIVV enables the WBEM service and then disables after retrieving iDRAC IP for hosts running ESXi 6.5 and
later.
OMIVV uses the WBEM service to properly synchronize the ESXi host and the iDRAC relationships. If configuring the SNMP
trap destination fails for particular hosts, and/or enabling the WBEM service fails for particular hosts, those hosts are listed
as non-complaint. To view and fix the non-compliance, see Fix a non-compliant host on page 69 .
4. On the Configure Additional Settings page, do the following:
a. Schedule inventory jobs. For more information about scheduling the inventory job, see Schedule inventory job on page
103.
b. Schedule warranty retrieval job. For more information about scheduling the warranty retrieval job, see Schedule warranty
retrieval jobs on page 103.
If you want to modify the inventory job schedule, go to Settings > vCenter Settings > Data Retrieval Schedule >
Inventory Retrieval or Jobs > Inventory > Hosts Inventory.
If you want to modify the warranty retrieval job schedule, go to Settings > vCenter Settings > Data Retrieval
Schedule > Warranty Retrieval or Jobs > Warranty.
c. Configure events and alarms. For information about configuring events and alarms, see Configure events and alarms on
page 92.
d. To apply individual settings, click the Apply button separately, and then click NEXT.
It is highly recommended to enable all the additional settings. If any of the additional settings are not applied, a message
is displayed indicating that the all the additional settings are mandatory.
5. On the Next Steps page, read the instructions, and then click FINISH.
It is recommended that you associate your OMIVV hosts with a configuration baseline because it enables you to closely
monitor the configuration changes happening in hosts and associated clusters. Configuration baseline can be created for any
cluster once the hosts are successfully managed by OMIVV. To create a configuration baseline, do the following:
● Create Repository Profile for Firmware and Driver—This helps you to define baselined firmware and driver versions.
● Create System Profile—This helps you to define baselined hardware configurations for hosts.
● Create Cluster Profile—To create successful baseline, select clusters and associate firmware, drivers, and hardware
configurations.
● The hosts present in a PowerEdge MX chassis with an iDRAC IPv4 disabled has to be managed using a chassis credential
profile.
View initial configuration status
On the Initial Configuration wizard page, you can perform the following:
● View initial configuration status
Initial configuration status shows completed only when all the vCenters are configured with host credential profile, events
and alarms, inventory and warranty jobs.
● Launch initial configuration wizard
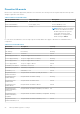
Firmware update settings
Selecting the Clear iDRAC Jobs and reset iDRAC check box, clears all the iDRAC jobs present in the Job Queue followed by
iDRAC reset before updating firmware on the host.
The Clear iDRAC Jobs and reset iDRAC setting is used when performing:
Manage OMIVV appliance settings
87