
Users Guide

1. Go to https://<ApplianceIP/hostname/>.
2. In the Login dialog box, enter the password.
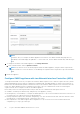
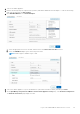
3. In the left pane, click ALERT MANAGEMENT. To enter new vCenter alert settings, click Edit.
4. Enter numeric values in the following fields:
By default, the counts of the current number of alerts are displayed.
● Maximum number of alerts
● Number of days to retain alerts
● Timeout for duplicate alerts (seconds)
5. To save your settings, click Apply.
About OMIVV VM console
The OMIVV VM console is available within the vSphere client on a VM. The console works in close association with the
Administration Console. You can use the console to perform the following tasks:
● Configure network settings
● Change the OMIVV appliance password
● Configure NTP and setting the local time zone
● Reboot the OMIVV appliance
● Reset the OMIVV appliance to factory settings
● Log in using read-only role
● Log out from console
Open OMIVV VM console
To open the OMIVV VM console, launch web or remote console of OMIVV appliance.
After opening the VM console and entering the credentials (user name: admin and password: the password that you had set
while deploying the appliance), you can configure the console.
Configure OMIVV appliance
1. Power on the VM.
2. In the right-pane, click Launch Web Console.
3. Log in as an administrator (the default user name is admin).
4. If you are logging in for the first time, follow the instructions on the screen to set the password (Admin and ReadOnly
users).
NOTE:
If you forget the administrator password, it cannot be recovered from the OpenManage Integration for VMware
vCenter appliance.
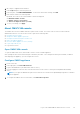
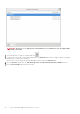
5. To configure the OMIVV time zone information, click Date/Time Properties.
Log in to Dell EMC OMIVV administration console
25