
Users Guide

• System profile deployment
For more information, see Deploy system profile (configuration of the hardware).
• ISO profile deployment
For more information, see Deploy ISO profile (ESXi installation) .
• System profile and ISO profile deployment
For more information, see Deploy system profile and ISO profile.
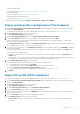
To launch the deployment wizard, go to Compliance & Deployment > Deployment > DEPLOY.
Deploy system profile (configuration of the hardware)
1. On the System Profile and ISO Profile Deployment Checklist page of the deployment wizard, verify the deployment checklist,
and then click GET STARTED.
You can perform the deployment only on the compliant bare-metal servers. For more information, see View bare-metal servers.
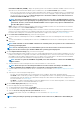
2. On the Select Server (s) page, select one or more servers.
The Select Deployment Options page is displayed.
3. On the Select Deployment Options page, select System Profile (Configuration of the hardware).
4. From the System Profile drop-down menu, select an appropriate system profile, and then click NEXT.
For basic and advanced system profile types, the system profile name is displayed in the following format: Basic_<system profile
name>, Advanced_<system profile name>.
The Configuration Preview page is displayed. The Configuration Preview enables you to preview about the import operation of a
server configuration profile (success or failure) on the selected server (s).
5. To create a preview job on iDRAC, on the Configuration Preview page, select an iDRAC IP, and then click PREVIEW. Configuration
Preview is an optional task.
The system profile preview operation may take few minutes to complete. The comparison status is displayed in the Result column.
The following are the comparison results:
• Completed—The preview job is successfully run. For more information about the comparison results, click View Details in the
Details column.
• Not completed—The preview job is not successfully run on the iDRAC. Ensure that iDRAC is accessible, and perform iDRAC reset,
if required. For more information about the job, see the OMIVV logs and the logs at iDRAC console.
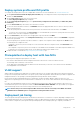
6. On the Schedule Deployment Job page, do the following:
a) Enter the deployment job name and description. The description is an optional field.
b) To run the deployment job immediately, click Run Now.
c) To schedule the job to run later, click Schedule later, and then select the date and time.
d) Select the Go to the Jobs page after the job is submitted check box.
You can track the status of the job on the Jobs page. For more information, see Deployment jobs.
7. Click FINISH.
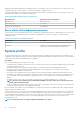
Deploy ISO profile (ESXi installation)
You can perform the deployment only on the compliant bare-metal servers. For more information, see View bare-metal servers.
1. On the System Profile and ISO Profile Deployment Checklist page of the deployment wizard, verify the deployment checklist,
and then click GET STARTED.
2. On the Select Server (s) page, select one or more servers.
The Select Deployment Options page is displayed.
3. On the Select Deployment Options page, select ISO Profile (ESXi installation).
4. From the vCenter Name drop-down menu, select an instance of vCenter.
5. To select the vCenter destination container, click BROWSE, and select an appropriate data center or cluster on which you want to
deploy an operating system.
6. From the ISO Profile drop-down menu, select an appropriate ISO profile.
7. Under Installation Target, select any one of the following:
• First boot disk—deploys an operating system on the Hard Drive, Solid State Drive (SSD), or virtual drive created by RAID
controllers.
Deployment
51