
Users Guide


The allocated CPU and memory are verified against the required CPU and memory for the set deployment mode.
• If the verification fails, an error message is displayed.
• If the verification is successful, the OMIVV appliance restarts and the deployment mode is changed after you confirm the change.
• If the required deployment mode is already set, a message is displayed.
5. If the deployment mode is changed, confirm the changes, and then the appliance is restarted to enable the deployment mode to be
updated.
NOTE: During the OMIVV appliance bootup, the allocated system resources are verified against the set deployment
mode. If the allocated system resources are less than the set deployment mode, the OMIVV appliance does not boot to
the login page. To boot the OMIVV appliance, close the OMIVV appliance, update the system resources to the existing
set deployment mode, and complete the downgrade deployment mode task.
Downgrade deployment mode
1. Log in to the Administration Console.
2. Change the deployment mode to the required level.
3. Shut down the OMIVV appliance and change the system resources to the required level.
4. Turn on the OMIVV appliance.
Upgrade deployment mode
1. Clear the browser cache before logging in to the Dell admin portal.
2. Turn on the OMIVV appliance.
3. Log in to the Administration Console.
4. Change the deployment mode to the required level.
Extended monitoring
Ensure to enable Extended Monitoring to support OpenManage Management Pack for vRealize Operations Manager. It is recommended
to perform extended monitoring through the 'Medium' deployment mode.
Ensure to enable SNMP Trap Monitoring to support SNMP alerts for OpenManage Management Pack for vRealize Operations Manager.
This allows the user to monitor the health status of the server or chassis in real time.
1. Go to https://<ApplianceIP/hostname/>.
2. In the left pane, click APPLIANCE MANAGEMENT.
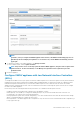
3. On the Appliance Management page, scroll down to Extended Monitoring.
4. To edit the extended monitoring settings, click Edit.
5. In the edit mode, enable or disable the extended monitoring and SNMP Trap Monitoring, and then click Apply.
Generate a Certificate Signing Request (CSR)
Before registering an OMIVV to a vCenter, ensure that you upload the CSR.
Generating a new CSR prevents certificates that were created with the previously generated CSR from being uploaded to the appliance.
To generate a CSR, do the following:
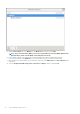
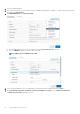
1. On the APPLIANCE MANAGEMENT page, click Generate Certificate Signing Request in the HTTPS CERTIFICATES area.
A message is displayed stating that if a new request is generated, certificates created using the previous CSR can no longer be
uploaded to the appliance. To continue with the request, click Continue.
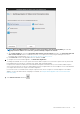
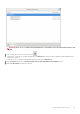
2. If you continue with the request, in the GENERATE CERTIFICATE SIGNING REQUEST dialog box, enter information about the
common name, organization, locality, state, country, and email address. Click Continue.
3. Click Download, and then save the resulting CSR to an accessible location.
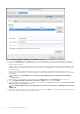
Upload HTTPS certificate
Ensure that the certificate uses the PEM format.
You can use the HTTPS certificates for secure communication between OMIVV appliance and host systems. To set up this type of secure
communication, send the CSR certificate to a signing authority, and then upload the resulting CSR using the admin console. There is also a
default certificate that is self-signed and can be used for secure communication—this certificate is unique to every installation.
About Administration Console
21