
Users Guide

Upload license to Administration Portal
You can use this option to upload OMIVV host license.
1. Go to https://<ApplianceIP/hostname/>.
2. In the Login dialog box, type the password.
3. In the left pane, click VCENTER REGISTRATION.
The registered vCenter servers are displayed in the working pane.
4. Click Upload License.
5. In the UPLOAD LICENSE dialog box, click Browse to go to the license file, and then click Upload.
If the license file is modified or edited, the OMIVV appliance views it as corrupted and the license file does not work.
Manage the OMIVV appliance
The OMIVV appliance management enables you to manage the OpenManage Integration for VMware vCenter network, NTP,
and HTTPS information, and enables an administrator to perform the following actions:
● Restart the OMIVV appliance. See Restart OMIVV appliance on page 16.
● Update the OMIVV appliance, and configure an update repository location. See Update OMIVV appliance and repository
location on page 16
● Upgrade OMIVV appliance using RPM. See Upgrade OMIVV appliance using RPM on page 17.
● Upgrade OMIVV appliance using backup and restore. See Upgrade OMIVV appliance using backup and restore on page 18.
● Generate and download the troubleshooting bundle. See Generate and download the troubleshooting bundle on page 20.
● Set up HTTP proxy. See Set up HTTP proxy on page 20.
● Set up Network Time Protocol servers. See Set up Network Time Protocol servers on page 20.
● Configure deployment mode. See Configure deployment mode on page 21.
● Extended monitoring See Extended monitoring on page 22.
● Generate a Certificate Signing Request (CSR). See Generate a Certificate Signing Request (CSR) on page 22.
● Upload HTTPS certificate. See Upload HTTPS certificate on page 22.
● Set up global alerts. See Set up global alerts on page 23.
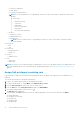
Access the appliance management
In OpenManage Integration for VMware vCenter, perform the following steps to access the APPLIANCE MANAGEMENT page
using the Administration Portal:
1. Go to https://<ApplianceIP/hostname/>.
2. In the Login dialog box, enter the password.
3. To configure the appliance management section, in the left pane, click APPLIANCE MANAGEMENT.
Restart OMIVV appliance
1. On the APPLIANCE MANAGEMENT page, click Restart the Virtual Appliance.
2. To restart the OMIVV appliance, in the Restart Virtual Appliance dialog box, click Apply.
Update OMIVV appliance and repository location
● To ensure that all data is protected, perform a backup of the OMIVV database before updating the OMIVV appliance. See
Manage backup and restore on page 18.
● The OMIVV appliance requires Internet connection to display the available upgrade mechanisms and perform the RPM
upgrade. Ensure that the OMIVV appliance has Internet connection. If you require a proxy network, based on the
environment network settings, enable the proxy settings, and enter the proxy data. See Setting up the HTTP proxy.
● Ensure that the Update Repository Path is valid.
● Ensure that you log out from all vSphere Client (HTML-5) sessions to the registered vCenter servers.
16
About Administration Console