
Users Guide

7. To save, click Apply.
Viewing data retrieval schedules for inventory and warranty
1. In the OpenManage Integration for VMware vCenter, on the Manage > Settings tab, under vCenter Settings, click Data Retrieval
Schedule.
On clicking, data retrieval schedule expands to expose the edit options for inventory and warranty.
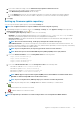
2. Click the
icon against Inventory Retrieval or Warranty Retrieval.
In the Inventory/Warranty Data Retrieval dialog box, you can view the following information for inventory or warranty retrieval:
• Whether the inventory and/or warranty retrieval option is enabled or disabled?
• The weekdays for which it is enabled.
• The time of day it is enabled.
3. To edit the data retrieval schedules, see the Modifying inventory job schedules or the Modifying warranty job schedules.
4. Click Data Retrieval Schedule again to contract the inventory and warranty schedules and display a single line.
Configuring SNMP trap community string
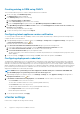
1. On the OpenManage Integration for VMware vCenter page, on the Manage > Settings tab, under Appliance Settings, click
against the OMSA SNMP Trap Community String.
The OMSA SNMP Trap Community String Settings dialog box is displayed. By default, public is displayed in the SNMP trap
community string.
2. Customize the public text to any string, and click Apply.
NOTE: The SNMP trap community string configuration for 11
th
generation of PowerEdge servers is set while
installing or upgrading OMSA through OMIVV.
40 Appliance configuration for VMware vCenter