
Users Guide

a. If you want to enable this setting, select the Enable warranty expiration notification for hosts.
Selecting the check box enables warranty expiration notification.
b. Under Minimum Days Threshold Alert, do the following:
i. In the Warning drop-down list, select the number of days before you want to be warned of the warranty expiration.
ii. In the Critical drop-down list, select the number of days before you want to be warned of the warranty expiration.
5. Click Apply.
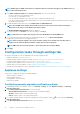
Setting up firmware update repository
You can set up the firmware update repository on the OMIVV Settings tab.
NOTE: You can update firmware for only non-vSAN host and clusters using this repository.
1. In OpenManage Integration for VMware vCenter, on the Manage > Settings tab, under Appliance Settings on the right side of
Firmware Update Repository, click the icon.
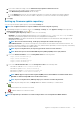
2. In the Firmware Update Repository dialog box, select one of the following:
• Dell Online—the firmware updates default repository is set to Dell Online (https://downloads.dell.com). The OMIVV
downloads selected firmware update from the Dell repository and updates the managed hosts.
• Dell Custom Online—the OMIVV downloads the selected firmware updates from the Dell Custom Online, and applies to the
managed hosts as necessary.
NOTE: Based on the network settings, enable proxy settings if the network needs a proxy.
• Shared Network Folder—you can have a local repository of the firmware in a CIFS-based or NFS-based network share. This
repository can either be a dump of Server Update Utility (SUU) that Dell releases periodically or a custom repository created using
DRM. This network share should be accessible by OMIVV.
NOTE: If you are using CIFS share, the repository passwords cannot exceed 31 characters.
NOTE: Ensure that you use the latest Dell EMC Repository Manager(DRM) version (3.0) and later.
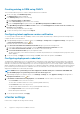
a. If you select Dell Custom Online, enter the Catalog Online Path in the following format:
• http://share/filename.xml.gz
• http://share/filename.gz
• https://share/filename.xml.gz
• https://share/filename.gz
b. If you select Shared Network Folder, enter the Catalog File Location in the following format:
• NFS share for .XML file—host:/share/filename.xml
• NFS share for .gz file—host:/share/filename.gz
• CIFS share for .XML file—\\host\share\filename.xml
• CIFS share for .gz file—\\host\share\filename.gz
NOTE:
OMIVV supports only Server Message Block(SMB) version 1.0 and SMB version 2.0 based CIFS shares.
Dell EMC recommends using SMB version 2.0 based CIFS shares.
NOTE: If you are using CIFS share, OMIVV prompts you to enter the username and password.
c. To validate the given catalog file location, click Begin Test. This validation is mandatory to continue further.
—Indicates that the test connection is successful.
—Indicates that the test connection is failed.
3. Click Apply.
NOTE: It might take up to 10 minutes to read the catalog from the source and update the OMIVV database.
Appliance configuration for VMware vCenter 37