
Users Guide

For example, the thumbprint string can appear as either of the following:
• ea87e150bb96fbbe1fa95a3c1d75b48c30db7971
• ea:87:e1:50:bb:96:fb:be:1f:a9:5a:3c:1d:75:b4:8c:30:db:79:71
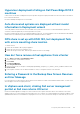
Extracting Thumbprint by using the command line
You can see the following sections for extracting thumbprint by using the command line on the appliance and Windows installation.
Extracting thumbprint by using the Command Line on the vCenter server appliance
Perform the following steps:
1. Move or upload the old_machine.crt certificate to PSC in the C:\certificates\old_machine.crt location that is created in
step 1 of retrieving the old certificate procedure. You can use Windows Secure Copy (WinSCP) or another SCP client to move or
upload the certificate.
2. Log in to the External Platform Services Controller appliance through Secure Shell (SSH).
3. Run the following command to enable accessing the Bash shell: shell.set --enabled true.
4. Type shell and press Enter.
5. Run the following command to extract the thumbprint: openssl x509 -in /certificates/old_machine.crt -noout -
sha1 –fingerprint
NOTE: The thumbprint appears as a sequence of numbers and letters after the equal sign, which is as follows: SHA1
Fingerprint= ea:87:e1:50:bb:96:fb:be:1f:a9:5a:3c:1d:75:b4:8c:30:db:79:71
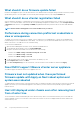
Extracting thumbprint by using the Command Line on Windows installation
Perform the following steps:
1. Move or upload the old_machine.crt certificate to PSC in the C:\certificates\old_machine.crt location that is created in
step 1 of retrieving the old certificate procedure. You can use Windows Secure Copy (WinSCP) or another SCP client to move or
upload the certificate.
2. Connect to External Platform Services Controller through remote desktop connection.
3. Open command prompt in administrative mode.
4. Run the following command to extract the thumbprint: "%VMWARE_OPENSSL_BIN%" x509 -in c:\certificates
\old_machine.crt -noout -sha1 –fingerprint
NOTE:
The thumbprint appears as a sequence of numbers and letters after the equal sign, which is as follows: SHA1
Fingerprint=09:0A:B7:53:7C:D9:D2:35:1B:4D:6D:B8:37:77:E8:2E:48:CD:12:1B
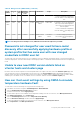
Run the ls_update_certs.py with the old thumbprint. Log out and log in to the vCenter Web client after the services are updated
successfully. The Dell plug-in launches successfully.
In Administration Console, Update Repository Path is not
set to default path after I reset appliance to factory
settings
After you reset the appliance, go to the Administration Console, and then click APPLIANCE MANAGEMENT in the left pane. In the
Appliance Settings page, the Update Repository Path is not changed to the default path.
Resolution: In Administration Console, manually copy the path in the Default Update Repository field to the Update Repository
Path field.
Warranty and inventory schedule for all vCenters is not
applying when selected from the job queue page
Navigate to Dell Home > Monitor > Job Queue > Warranty/Inventory History > Schedule. Select a vCenter and select the modify
schedule button. When a dialog is displayed, you can view a check box with the Apply to All Registered vCenters message. When you
select the check box and press Apply, the setting is applied to a particular vCenter that you had initially selected and not all vCenters. The
Apply to All Registered vCenters is not applicable when warranty or inventory schedule is modified from the Job Queue page.
Resolution: Use the modify warranty or inventory schedule from the job queue only to modify the selected vCenter.
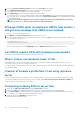
Frequently Asked Questions-FAQ
141