
Users Guide

About Administration Console
You can achieve the administration of OpenManage Integration for VMware vCenter and its virtual environment using the following two
administration portals:
• Web-based Administration Console
• Console view for an individual server—the virtual machine console of the OMIVV appliance
Topics:
• Using Administration Portal
Using Administration Portal
You can use the administration portal to perform the following tasks:
• Register a vCenter server. See Registering a vCenter server.
• Modify vCenter login credentials. See Modifying the vCenter login credentials.
• Update SSL certificates. See Updating the SSL certificates for registered vCenter servers.
• Upload or buy a license. If you are using a Evaluation license, the Buy Software link is displayed. By clicking this link, you can purchase
a full-version license for managing multiple hosts. See Uploading license to the Administration Portal.
• Update OMIVV. See Updating virtual appliance repository location and virtual appliance on page 16.
• Generate troubleshooting bundle. See Downloading troubleshooting bundle on page 28.
• Restart OMIVV. See Restarting virtual appliance on page 15.
• Perform backup and restore. See Updating appliance through backup and restore on page 17.
• Configure alerts. See Setting up global alerts on page 19.
• Configure the deployment mode, see Configuring deployment mode on page 18.
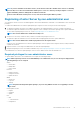
Registering vCenter server
You can register the OMIVV appliance after the OpenManage Integration for VMware vCenter is installed. OpenManage Integration for
VMware vCenter uses the administrator user account or a non-administrator user account with necessary privileges for vCenter
operations. A single OMIVV appliance instance can support a total of 10 vCenter servers and up to 1000 ESXi hosts.
To register a new vCenter server, perform the following steps:
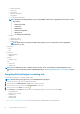
1. Open Administration Portal from a supported browser.
To open Administration Portal, in the Help and Support tab of OpenManage Integration for VMware vCenter, click the link under
Administration Console or start a web browser and provide the https:\\<ApplianceIP|hostname>.
2. In the left pane, click VCENTER REGISTRATION, and then click Register a New vCenter Server.
3. In the REGISTER A NEW VCENTER dialog box, under vCenter Name, perform the following steps:
a. In the vCenter Server IP or Hostname text box, enter the vCenter IP address or FQDN of the host.
NOTE:
Dell recommends that register OMIVV with the VMware vCenter using Fully Qualified Domain Name
(FQDN). For all registrations, the hostname of vCenter should be properly resolvable by the DNS server. The
following are the recommended practices for using the DNS server:
• Assign a static IP address and hostname when you deploy an OMIVV appliance with a valid DNS registration. A
static IP address ensures that during the system restart, the IP address of the OMIVV appliance remains
same.
• Ensure that OMIVV hostname entries are present in both forward and reverse lookup zones in your DNS
server.
b. In the Description text box, enter a description—optional.
4. Under vCenter User Account, perform the following steps:
2
About Administration Console 11