
Install Guide


NOTE: If the IP address of the new OMIVV version y is changed from the OMIVV version x, congure the trap destination
for the SNMP traps to hover over the new appliance. For 12th and later Gen servers, the IP change is xed by running the
inventory on these hosts. While running the inventory on 12th Gen hosts, if SNMP traps do not hover over the new IP, those
hosts are listed as noncomplaint. For hosts earlier than 12th Gen that were compliant with earlier versions, the IP change is
displayed as noncompliant and requires you to congure Dell EMC OpenManage Server Administrator (OMSA). To x
vSphere host compliance issues, see Running the x noncompliant vSphere hosts wizard topic in
User's Guide
.
NOTE: After backup and restore from an earlier OMIVV version to a later OMIVV version, if you observe 2 Million error or
Dell EMC logo is not displayed at vCenter, do the following:
• Restart vSphere Web Client on the vCenter server.
• If the issue persists:
– For VMware vCenter Server Appliance, go to /etc/vmware/vsphere-client/vc-packages/vsphere-client-serenity and for
Windows vCenter, go to C:\ProgramData\VMware\vCenterServer\cfg\vsphere-client\vc-packages\vsphere-client-
serenity folder in the vCenter appliance and see if the old data exists, such as:
com.dell.plugin.OpenManage_Integration_for_VMware_vCenter_WebClient-X.0.0.XXX.
– Manually delete the folder corresponding to the earlier OMIVV version.
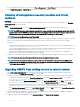
Recovering OMIVV after unregistering earlier version of
OMIVV
About this task
If you have unregistered the OMIVV plug-in after taking backup of the database of the earlier version, perform the following steps before
proceeding with the migration:
NOTE
: Unregistering the plug-in removes all the customization that was implemented on the registered alarms by the plug-in.
The following steps do not restore the customization. However, it re-registers the alarms in their default state.
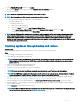
Steps
1 Perform step 3 through step 5 in Updating appliance through backup and restore.
2 Register the plug-in to the same vCenter that you had registered in the earlier plug-in.
3 To complete the migration, perform step 6 through step 9 in Updating appliance through backup and restore.
30
Introduction