
Install Guide


b In the Select a folder or datacenter list, select a location for deploying the template.
10 Click Next.
The Select Storage window is displayed.
11 In the Select Storage window, perform the following substeps:
a In the Select Virtual Disk Format drop-down list, select either of the following formats:
• Thick Provision (lazy Zeroed)
• Thick Provision (Eager zeroed
• Thin Provision
It is recommended that you select, Thick Provision (Eager Zeroed).
b In the VM Storage Policy drop-down list, select a policy.
12 Click Next.
The Setup Networks window is displayed that includes details about the source and destination networks.
13 In the Setup Networks window, click Next.
NOTE: It is recommended that the OMIVV appliance and the vCenter server are located in the same network.
14 In the Ready to Complete window, review the selected options for the OVF deployment task and click Finish.
The deployment job runs and provides a completion status window where you can track the job progress.
Generating Certicate Signing Request
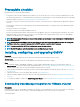
Prerequisite
Ensure that you upload the certicate before registering OMIVV with the vCenter.
About this task
Generating a new Certicate Signing Request (CSR) prevents certicates that were created with the previously generated CSR from being
uploaded to the appliance. To generate a CSR, do the following:
Steps
1 In the APPLIANCE MANAGEMENT page, click Generate Certicate Signing Request in the HTTPS CERTIFICATES area.
A message is displayed stating that if a new request is generated, certicates created using the previous CSR can no longer be
uploaded to the appliance. To continue with the request, click Continue, or to cancel, click Cancel.
2 If you continue with the request, in the GENERATE CERTIFICATE SIGNING REQUEST dialog box, enter the Common Name,
Organizational Name, Organizational Unit, Locality, State Name, Country, and Email for the request. Click Continue.
3 Click Download, and then save the resulting certicate request to an accessible location.
Uploading HTTPS certicate
Prerequisite
Ensure that the certicate uses PEM format.
About this task
You can use the HTTPS certicates for secure communication between the virtual appliance and host systems. To set up this type of
secure communication, a CSR must be sent to a certicate authority and then the resulting certicate is uploaded using the Administration
Console. There is also a default certicate that is self-signed and can be used for secure communication; this certicate is unique to every
installation.
NOTE
: You can use the Microsoft internet explorer, Firefox, Chrome to upload certicates.
Steps
1 In the APPLIANCE MANAGEMENT page, click Upload Certicate in the HTTPS CERTIFICATES area.
2 Click OK in the UPLOAD CERTIFICATE dialog box.
3 To select the certicate to be uploaded, click Browse, and then click Upload.
20
Introduction