
Users Guide


NOTE: Dell recommends that register OMIVV with the VMware vCenter by using Fully Qualified Domain Name
(FQDN). For all registrations, the hostname of vCenter should be properly resolvable by the DNS server. The
following are the recommended practices for using the DNS server:
• Assign a static IP address and hostname when you deploy an OMIVV appliance with a valid DNS registration. A
static IP address ensures that during the system restart, the IP address of the OMIVV appliance remains
same.
• Ensure that OMIVV hostname entries are present in both forward and reverse lookup zones in your DNS
server.
b) In the Description text box, enter a description—optional.
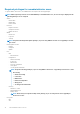
4. Under vCenter User Account, perform the following steps:
a) In the vCenter User Name text box, enter the administrator’s user name or a nonadministrator user name with the required
privileges.
b) In the Password text box, enter the password.
c) In the Verify Password text box, enter the password again.
5. Click Register.
After registering the vCenter server, OMIVV is registered as a vCenter plug-in, and “Dell EMC OpenManage Integration” icon is visible in
the vSphere web client from which you can access the OMIVV functionalities.
NOTE: For all vCenter operations, OMIVV uses the privileges of the registered user and not the privileges of the logged-
in user.
User X with the necessary privileges registers OMIVV with vCenter, and user Y has only Dell privileges. User Y can now log in to the
vCenter and can trigger a firmware update task from OMIVV. While performing the firmware update task, OMIVV uses the privileges of
user X to put the host into maintenance mode or reboot the host.
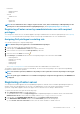
Modifying vCenter login credentials
The vCenter login credentials can be modified by a user with administrative privileges or a nonadministrator user with necessary privileges.
1. To open Administration Portal, in the Help and Support tab of OpenManage Integration for VMware vCenter, click the link under
Administration Console or start a web browser and provide the https:\\<ApplianceIP|hostname> url.
2. In the Login dialog box, type the password, and click Login.
3. In the left pane, click VCENTER REGISTRATION.
The registered vCenter servers are displayed in the right pane of the MANAGE VCENTER SERVER CONNECTIONS window. To open
the MODIFY USER ACCT window, under Credentials, click Modify for a registered vCenter.
4. Enter the vCenter User name, Password, and Verify Password; the passwords must match.
5. To change the password, click Apply, or to cancel the change, click Cancel.
NOTE: An error message is displayed, if the provided user credentials do not have necessary privileges.
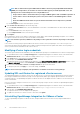
Updating SSL certificates for registered vCenter servers
The OpenManage Integration for VMware vCenter uses the OpenSSL API to create the Certificate Signing Request (CSR) by using the
RSA encryption standard with a 2048–bit key length. The CSR generated by OMIVV gets a digitally signed certificate from a trusted
certification authority. The OpenManage Integration for VMware vCenter uses the digital certificate to enable SSL on the web server for
secure communication.
If the SSL certificate is changed on a vCenter server, use the following steps to import the new certificate for OpenManage Integration
for VMware vCenter:
1. To open Administration Portal, in the Help and Support tab of OpenManage Integration for VMware vCenter, click the link under
Administration Console or start a web browser and provide the https:\\<ApplianceIP|hostname> url.
2. In the left pane, click VCENTER REGISTRATION.
The registered vCenter servers are displayed in the right pane.
3. To update the certificate for a vCenter server IP or host name, click Update.
Uninstalling OpenManage Integration for VMware vCenter
To remove OpenManage Integration for VMware vCenter, unregister OMIVV from the vCenter server by using the Administration
Console.
14
About Administration Console