
Install Guide
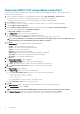
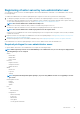
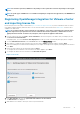
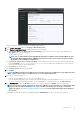
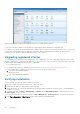

Figure 4. OpenManage Integration for VMware vCenter successfully added to vCenter
For all vCenter operations, OMIVV uses the privileges of a registered user and not the privileges of a logged-in user.
For example: User X with the necessary privileges registers OMIVV with vCenter, and user Y has only Dell privileges. User Y can now log in
to the vCenter and can trigger a firmware update task from OMIVV. While performing the firmware update task, OMIVV uses the
privileges of user X to put the machine into maintenance mode or reboot the host.
Upgrading registered vCenter
You can upgrade a registered vCenter for non-administrator users or administrator users. Before upgrading a registered vCenter, see the
VMware Documentation if you upgrade to the latest version of the vCenter server, such as vCenter 6.5. Perform the tasks in either of the
following options after upgrading a registered vCenter, as applicable:
• For non-administrator users:
1. Assign extra privileges to non-administrator users, if necessary. See Required privileges for non-administrator users.
For example, when you upgrade from vCenter 6.0 to vCenter 6.5, assign the extra privileges.
2. Reboot the registered OMIVV appliance.
• For administrator users:
1. Reboot the registered OMIVV appliance.
Verifying installation
The following steps verify that the OMIVV installation is successful:
1. Close any vSphere client windows, and start a new vSphere web client.
2. Confirm that the OMIVV icon appears inside vSphere web client.
3. Ensure that vCenter can communicate with OMIVV by attempting a PING command from the vCenter server to the virtual appliance
IP address or host name.
4. In vSphere Web Client, click Home > Administration > Solutions, and click Plug-In Management (in older vCenter versions) or
Client Plug-Ins (in newer versions).
For more information about the access restrictions for Plug-In Management or Client Plug-Ins page, see VMware documentation.
5. In the Plug-In Management or Client Plug-Ins window, verify if OMIVV is installed and enabled.
20
Introduction