
Users Guide
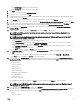

9. A dialog box that states extracting the settings will take several minutes is displayed, then click Continue. The settings are
populated, and the selected server’s name, iDRAC IP address, and service tag are displayed in the Reference Server window.
The prole is saved, and displays in the Hardware Proles window under Available Proles.
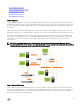
About Managing Hardware Proles
Hardware proles dene a server's hardware conguration using a reference server. From the Dell Management Center, there are
several management actions you can perform on existing hardware proles, including:
• Viewing Or Editing Hardware Proles
• Duplicating Hardware Proles
• Duplicating Hardware Proles
• Deleting Hardware Proles
• Refreshing Hardware Proles
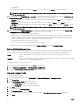
Viewing Or Editing Hardware Proles
To view or edit a hardware prole:
1. In the Dell Management Center, select Deployment → Deployment Templates → Hardware Proles.
2. Select a prole and click View/Edit.
3. In the Hardware Prole window, to make any changes, click Edit.
4. Click Save to apply changes, or click Cancel to cancel changes.
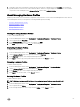
Duplicating Hardware Proles
To duplicate a hardware prole:
1. In the Dell Management Center, select Deployment → Deployment Templates → Hardware Proles.
2. On the Hardware Prole page, select a prole, and then click Duplicate.
3. In the Duplicate dialog box, enter a unique hardware prole name.
4. Click Apply to create a copy of the prole with the new name, or click Cancel to cancel.
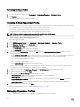
Renaming Hardware Proles
To rename a hardware prole:
1. In the Dell Management Center, select Deployment → Deployment Template → Hardware Proles.
2. On the Hardware Prole page, select a prole and click Rename.
3. In the Rename dialog box, enter a unique hardware prole name.
4. Click Apply to use the new name, or click Cancel to cancel.
Deleting Hardware Proles
To delete a hardware prole:
NOTE: Deleting a hardware prole that is part of a running deployment task can cause the task to fail.
1. In the Dell Management Center, select Deployment → Deployment Templates → Hardware Proles.
2. Select a prole and click Delete.
3. In the message dialog box, to remove the prole click Delete , or click Cancel to cancel.
53