
Users Guide
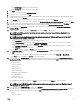

• In the Prole Name text box, enter the prole name.
• In the Description text box, type an optional description.
4. Click Save.
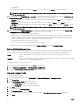
5. To continue, in the left pane, click Reference Server.
6. In the Reference Server window, click Edit.
7. To nd a reference server that is compliant, managed by vCenter, and successfully inventoried by the OpenManage Integration
for VMware vCenter
, click Browse.
8. In the Servers dialog box, scroll down the list to nd the right reference server, and click Select.
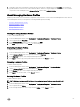
9. To customize the reference server settings as defaults, click Customize Settings from Reference Server , and then click Save.
10. A dialog box that states extracting the settings takes several minutes is displayed. To populate settings, click Continue. The
selected server’s name, iDRAC IP address, and service tag are displayed in the Reference Server window.
11. In the left pane, select Boot Order. To include boot order information in the prole, select the Include Boot Order in this
Hardware Prole check box.
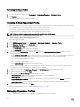
12. To display the boot order options, expand Boot Order, and then click Edit to make updates:
NOTE: For Dell 13th generation PowerEdge Servers, only the current boot mode details are displayed for the
hardware proles.
NOTE: Operating system deployment from OpenManage Integration for VMware and vCenter fails if the BOOT
mode in the target machine is set to UEFI
a. In the Boot Mode drop-down list to select either BIOS or UEFI.
b. In the View/Congure drop-down list, under Boot Device Sequence, to make changes to the boot device sequence
displayed, select the device and click either Move Up or Move Down.
c. In the Boot Retry Sequence drop-down list, select Enabled so that the server automatically retries the boot sequence, or
select Disabled to not retry the sequence.
d. Click Save to save the changes, or Cancel to cancel the changes.
13. If the BIOS boot mode was selected, you can expand Hard Drive Sequence to display the hard drive sequence options, and
click Edit to make updates:
• To make changes to the hard drive sequence displayed, select the device and click either Move Up or Move Down.
• Click Save to save the changes, or Cancel to cancel the changes.
14. In the left pane, select BIOS Settings. To include BIOS setting information in the prole, select the Include BIOS Settings in
this Hardware Prole check box. Expand a category to display the setting options, and click Edit to make updates to one of the
following:
• Memory Settings
• Processor Settings
• SATA Settings
• Integrated Devices
• Serial Communication
• Embedded Server Management
• Power Management
• System Security
• Miscellaneous Settings
Once all updates are made for a category, click Apply to save the changes or click Cancel to cancel the changes.
NOTE: For detailed BIOS information, including setting options and explanations, refer to the
Hardware Owner’s
Manual
for the selected server.
15. In the left pane, select iDRAC Settings and then select Network.
16. To include network setting information in the prole, select the Include Network Settings in this Hardware Prole check box.
Expand a category to display the setting options, and click Edit to make updates to one of the following:
• Network
• Network Settings
51