
Users Guide


Creating A New Connection Prole
A connection prole stores the credentials that the virtual appliance uses to communicate with Dell servers. Each Dell server must be
associated with only one connection prole to be managed by the
OpenManage Integration for VMware vCenter. You may assign
multiple servers to a single connection prole. Creating the Connection Prole is similar between the Conguration Wizard and Dell
Management Center, connection proles. You can run the Conguration Wizard when you rst access the Dell Management
Console, or run it later on the Connection Proles window.
NOTE: Refer the About OpenManage Integration for VMware vCenter Licensing for more information about licensing.
You are not allowed to create a connection prole if the number of hosts added exceeds the license limit.
To create a new connection prole:
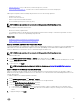
1. In the OpenManage Integration for VMware vCenter , in the left pane, click Connection Proles.
2. Click Create New link.
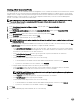
3. In the Prole Name and Description page, enter the Connection Prole Name and an optional Connection Prole
Description
that are used to help manage custom connection proles.
4. In the Associated Hosts page, select the hosts for the connection prole and click Next.
5. In the Credentials page, read the information and click Next.
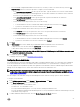
6. In the iDRAC page, under Credentials, do one of the following:
NOTE: The iDRAC account requires administrative privileges for updating rmware, applying hardware proles, and
deploying hypervisor.
• For iDRACs already congured and enabled for Active Directory on which you want to use Active Directory, select the Use
Active Directory check box; otherwise skip down to congure the iDRAC credentials.
– In the Active Directory User Name text box, type the user name. Type the username in one of these formats: domain
\username or domain/username or username@domain. The user name is limited to 256 characters. Refer to Microsoft
Active Directory documentation for user name restrictions.
– In the Active Directory Password text box, type the password. The password is limited to 127 characters.
– In the Verify Password text box, type the password again.
– In the Certicate Check drop-down list, select one of the following:
* To download and store the iDRAC certicate and validate it during all future connections, select Enabled .
* To perform no check and not store the certicate, select Disabled.
• To congure iDRAC credentials without Active Directory, do the following:
– In the User Name text box, type the user name. The user name is limited to 16 characters. Refer to the iDRAC
documentation for information about user name restrictions for your version of iDRAC.
NOTE: The local iDRAC account requires administrative privileges for updating rmware, applying hardware
proles, and deploying hypervisor.
– In the Password text box type the password. The password is limited to 20 characters.
– In the Verify Password text box, type the password again.
– In the Certicate Check drop-down list, select one of the following:
* To download and store the iDRAC certicate and validate it during all future connections, select Enabled.
* To perform no check and not store the iDRAC certicate, select Disabled.
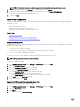
7. Click Next.
8. In the Host Credentials page, under Credentials, do one of the following:
22