
Setup Guide


2
Understanding How to Congure or Edit the
OpenManage Integration for VMware vCenter
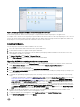
After you complete the basic installation of the OMIVV, the Initial Conguration Wizard is displayed when you click the OMIVV icon.
Use the Initial Conguration Wizard to congure the Settings on rst launch. For subsequent instances use the Settings page.
From the Initial Conguration Wizard you can create a connection prole, edit the settings of warranty, inventory, events and
alarms. Although, using the Initial Conguration Wizard is the most common method used, you can also accomplish this task
through the appliance's OpenManage Integration → Manage → Settings page in the OMIVV. For more information on the Initial
Conguration Wizard, see, OpenManage Integration for VMware vCenter User Guide available at dell.com/support/manuals.
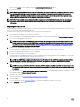
Conguration Tasks Using the Conguration Wizard
The Initial Conguration Wizard can be used to congure the following for one vCenter or for all registered vCenters:
NOTE: If you view a web communication error in the vCenter Web client while performing OMIVV related tasks after
changing the DNS settings, perform the following:
• Clear the browser cache.
• Logout and login from the Web client.
1. vCenter Selection
2. Creating A New Connection Prole
3. Scheduling Inventory Jobs
4. Running A Warranty Retrieval Job
5. Conguring Events And Alarms
NOTE: You can also launch the Initial Conguration Wizard using the link Start Initial Conguration Wizard under Basic
Tasks in the Getting Started page.
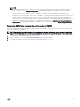
Conguration Wizard Welcome Page
After you install the OMIVV, it must be congured.
1. In the vSphere Web Client, click Home, and then click OpenManage Integration Icon.
2. The rst time you click the OpenManage Integration icon, it opens the Conguration Wizard. You can also access this wizard
on the OpenManage Integration → Getting Started → Start Initial Conguration Wizard page.
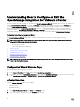
vCenter Selection
Using the vCenter Selection page you can congure:
• a specic vCenter
• all available vCenters
1. In the Initial Conguration Wizard, click Next in the Welcome screen.
2. Select one vCenter or all vCenters from the vCenters drop-down list.
16