
Users Guide

virtual machines can be migrated when a host enters/exits maintenance mode during the firmware update process. You can only schedule
or run one firmware update task at a time.
If you want to export from the wizard, use the Export to CSV button. Search is available for locating a specific cluster, datacenter, host,
or any topic item from the datagrid except for Date Applied.
NOTE: VMware recommends clusters to be built with identical server hardware. For the firmware update at a cluster
level with the number of hosts near the limits for a cluster (recommended by VMware) or composed of different models
of Dell servers, usage of vSphere web client is recommended.
NOTE: For information on changing the default timeout setting, see the Troubleshooting section of the
User’s Guide
.
You can view the status and manage Firmware update jobs from the Job Queue page. See, Viewing Firmware Details for Datacenters and
Clusters.
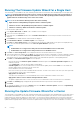
1. Click OpenManage Integration icon, click Clusters that is displayed in the left pane. The list of clusters are displayed.
2. Click a cluster from the displayed list. The main menu is displayed with different options.
3. Click Monitor -->Dell Cluster Information -->Firmware. The Run Firmware Wizard screen is displayed.
4. Click Run Firmware Wizard link. The Welcome page is displayed.
5. Click Next. The Select Update Source screen is displayed where you can select the bundles. The Repository location is also
displayed.
6. Select host from the displayed list in the Select Bundles area. You should select at least one bundle for firmware update. Each host
has a drop-down list next to the host name from which you can select the required bundle.
NOTE:
• 64-bit bundles are not supported for 12th generation hosts with iDRAC version 1.51 and earlier.
• 64-bit bundles are not supported for 11th generation hosts on all iDRAC versions.
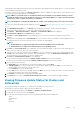
7. Click Next. The Select Components screen is displayed. This screen displays the details of components such as, model name, host
name, service tag, component, and so on for the selected host.
8. Select at least one component from the list, and click Next to proceed. You can filter the content of the component data grid using
the Filter field or, drag and drop columns within the component data grid. If you select the Allow Firmware downgrade check box,
the existing firmware version rolls back to the previous available version.
9. Click Next, the Schedule Firmware Update screen is displayed.
a) Enter the firmware update job name in the Firmware Update Job Name field. This value is mandatory.
b) Enter the firmware update description in the Firmware Update Description field. This value is optional.
10. Select an option from the following.
a) Update Now, select this radio button to run the firmware update job now and click Next.
b) Schedule Update button, select this radio button to run the firmware update job later and click Next. You can schedule the
firmware update job after 30 minutes from the current time.
c) In the Calendar box, select the month and day.
d) In the Time text box, type the time in HH:MM, and then click Next. The time is the local timezone where your client is physically
located. Any invalid time values result in a blocked update.
11. The Summary screen is displayed with all the firmware update details.
12. Click Finish and the message, The firmware update job has been created for successful firmware update is displayed.
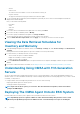
Viewing Firmware Update Status for Clusters and
Datacenters
For information to display on this page, run or schedule a firmware update for a cluster or a host.
On this page you can refresh, purge, or abort your firmware update jobs.
1. From the OpenManage Integration, select Monitor > Job Queue > Firmware Updates.
2. To display the most recent information, click Refresh.
3. View the status in the datagrid. This grid offers the following information about firmware update jobs:
• Status
• Scheduled Time
• Name
• Description
Settings
47