
Setup Guide


Registering a vCenter server by using a user with necessary privileges
You can register a vCenter server for the OMIVV appliance by using a user with the required privileges. See step 21 of Registering
OMIVV within vCenter And Importing The License File for more information on registering a vCenter server.
Assigning Dell privileges to the role
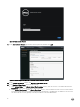
You can edit an existing role to assign the Dell privileges.
NOTE: Ensure that you are logged in as a user with Administrator privileges.
To assign the Dell privileges to an existing role, perform the following:
1. Log in to the vSphere client with administrative rights.
2. On the vSphere client Home page, click Roles.
3. Right-click the role to edit and select Edit Role.
4. Select the following privileges for Dell Infrastructure Deployment Role, Dell Operational Role, and click OK.
• Dell
– Dell.Conguration
– Dell.Deploy-Provisioning
– Dell.Inventory
– Dell.Monitoring
– Dell.Reporting
See the Security Roles and Permissions section in OpenManage Integration for VMware vCenter User's Guide for more
information on the available OMIVV roles within vCenter.
The changes to permissions and roles take eect immediately. The user with necessary privileges can now perform the OpenManage
Integration for VMware vCenter operations.
NOTE: For all vCenter operations, OMIVV uses the privileges of the registered user and not the privileges of the logged-
in user.
Registering OMIVV within vCenter And Importing The License File
Perform the following steps to register a vCenter server:
1. From vSphere client, select Home → Hosts and Clusters, then in the left panel, locate the deployed OMIVV, and then click
Power on the virtual machine if not powered on already.
2. Click the Console tab in the main VMware vCenter window to initiate the Administration Console.
3. Allow the OMIVV to nish booting up and then enter the user name as admin and press Enter.
4. Enter a new admin password. The password must be set as per the password complexity rules displayed. Press Enter.
5. Re-enter the password that was provided earlier and press Enter.
Press Enter to congure the network and time zone information in the OMIVV appliance.
6. To congure the OMIVV time zone information, click Date/Time Properties to set the time zone and date.
8