
Users Guide


list is disabled until the Internal Dual SD Module option button is selected. Toggling the option buttons should enable/
disable the drop-down list.
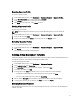
1. In the Global Settings page, to install the hypervisor, select one of the following deployment targets:
• Hard Disk
If you are deploying to a hard disk, click this option.
• Internal Dual SD Module
If you are deploying to an Internal Dual SD Module, click this option, and then select the Deploy the hypervisor
to the first hard disk for servers that do not have an available Internal Dual SD Module check box, this deploys
the hypervisor to the first disk on these systems.
CAUTION: All data on the disk drives will be erased!
If any of the selected servers do not support an Internal Dual SD Module, or an Internal Dual SD Module is not
present during deployment, then deployment to those servers is skipped and the deployment job continues to
the next server.
2. Click Next.
To continue with the task to Step 4, click Deployment Wizard Step 4: Server Identity.
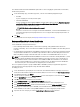
Deployment Wizard Step 4: Server Identification
Server identification can be provided in two ways:
• Enter networking information (IP address, subnet mask and gateway); a fully-qualified domain name for the
hostname is mandatory. The use of
localhost
for the FQDN is not supported. The FQDN is used when adding the host
to vCenter.
• Use the Dynamic Host Configuration Protocol (DHCP) to configure IP addresses, subnet mask, gateway IP, hostname
and preferred/alternate DNS servers. The DHCP assigned IP address will be used when adding the host to vCenter.
When using DHCP, it is highly recommended that an IP reservation for selected NIC MAC addresses be used.
NOTE: Use a Fully Qualified Domain Name (FQDN) for hostname instead of localhost. Starting with ESXi 5.1, a value
of localhost impairs OpenManage Integration for VMware vCenter from processing events sent from the host.
Create a DNS record that resolves the IP address to the FQDN. For SNMP alerts from ESXi 5.1 to be identified
correctly, configure the DNS server to support reverse lookup requests. The DHCP reservations and DNS host
names must be in place and verified before the deployment job is scheduled to run.
This screen provides the option to specify a VLAN ID. When a VLAN ID is provided, it is applied to the hypervisor’s
management interface during deployment and tags all traffic with the VLAN ID.
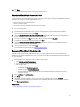
To identify your server:
1. Server Identification assigns deployed servers new names and network identification. To display a list of servers
that do not meet the minimum requirements for firmware, BIOS, or have other issues, click Non-Compliant Servers.
2. For additional information, click Details.
3. Once the systems are updated, click Check Compliance to retest and verify fixes. To refresh the list, click Refresh,
and click Abort All Test to cancel the testing.
4. Click ^ to expand and view individual server information.
5. Under Host Name and NIC, enter a Fully Qualified Host Name for the server.
6. In the NIC Management Tasks drop-down list, select the NIC that will be used for managing the server.
7. Enter IP addresses, subnet mask, and other network information, or select the Obtain using DHCP check box.
8. If deploying to a network that requires a VLAN ID, select the VLAN check box and then enter the VLAN ID.
For the VLAN ID, use the numbers 1 through 4094. VLAN ID 0 is reserved for tagging the priority of frames.
9. Repeat for all servers to deploy, or select the Apply settings to all selected servers check box.
74