
Users Guide


SupportAssist are verified. If the system prerequisites are met, the Welcome to Dell SupportAssist
Installer window is displayed.
5. Click Next.
The License Agreement window is displayed.
6. Read the terms in the communication requirements and click I Agree.
NOTE: SupportAssist installation requires that you allow Dell to save certain Personally
Identifiable Information (PII) such as your contact information, administrator credentials of the
devices to be monitored, and so on. SupportAssist installation cannot proceed unless you allow
Dell to save your PII.
7. Read the software license agreement, click I Agree, and then click Next.
If the system connects to the Internet through a proxy server, the Proxy Settings window is
displayed. Else, the Installing SupportAssist window is displayed briefly, and then the Installation
Completed window is displayed.
8. If the Proxy Settings window is displayed, provide the following:
a. In the Server Address field, type the proxy server address or name.
b. In the Port field, type the proxy port number.
NOTE: If the proxy server credentials are not provided, SupportAssist connects to the proxy
server as an anonymous user.
c. If the proxy server requires authentication, select Proxy requires authentication, and then
provide the following information in the corresponding fields:
• Username — The user name must contain one or more printable characters, and must not
exceed 104 characters.
• Password — The password must contain one or more printable characters, and must not
exceed 127 characters.
• Confirm Password — Re-enter the password. The password must match with the one
provided in the Password field.
d. Click Install.
The proxy settings are validated. If the validation is unsuccessful, verify the proxy settings and try
again or contact your network administrator for assistance.
e. In the Validation Successful dialog box, click OK.
The Installing SupportAssist window is displayed briefly, and then the Installation Completed
window is displayed.
9. Click Finish.
When you start SupportAssist, the SupportAssist Setup Wizard is displayed. You must complete all steps
in the SupportAssist Setup Wizard before you can use SupportAssist. For more information, see the Dell
SupportAssist User’s Guide
at Dell.com/ServiceabilityTools.
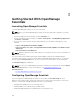
Installing Repository Manager
Dell Repository Manager is an application that helps manage system updates easily and effectively. Using
Repository Manager, you can build a custom repository based on the managed system configurations
that are obtained from OpenManage Essentials.
To install Repository Manager:
1. Double-click the OpenManage Essentials executable file.
2. In Dell OpenManageInstall, select Dell Repository Manager, and then click Install.
3. In Dell Repository Manager - InstallShield Wizard, click Next.
26