
Users Guide


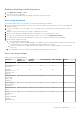

Table Of Contents
- Dell EMC OpenManage Enterprise-Modular Edition Version 1.00.01 for PowerEdge MX7000 Chassis User's Guide
- Overview
- Updating the management module firmware
- Logging in to OME-Modular
- Logging in to OME–Modular as local, Active Directory, or LDAP user
- OME-Modular home page
- Viewing device health
- Setting up chassis
- Initial configuration
- Configuring chassis settings
- Managing chassis
- Chassis groups
- Controlling chassis power
- Backing up chassis
- Restoring chassis
- Exporting chassis profiles
- Managing chassis failover
- Troubleshooting in chassis
- Blinking LEDs
- Interfaces to access OME-Modular
- Viewing chassis hardware
- Viewing chassis alerts
- Viewing chassis hardware logs
- Configuring OME–Modular
- Managing compute sleds
- Managing Storage
- Managing templates
- Managing identity pools
- Ethernet IO Modules
- MX scalable fabric architecture
- SmartFabric Services
- Managing networks
- Managing Fibre Channel IOMs
- Managing firmware
- Monitoring alerts and logs
- Monitoring audit logs
- Troubleshooting
- Storage
- Firmware update is failing
- Storage assignment is failing
- IOM status is downgraded
- IOM health is downgraded
- Drives on compute sled are not visible
- Storage configuration cannot be applied to IOMs
- Drives in OpenManage are not visible
- iDRAC and OpenManage drive information do not match
- The assignment mode of storage sled is unknown
- Storage
- Recommended slot configurations for IOMs

3. Enter the proxy address and the port number.
4. If the proxy requires authentication, select Enable Proxy Authentication and enter the credentials.
You can enable proxy authentication only if the Enable HTTP Proxy Settings option is selected.
5. Enter the proxy user credentials.
Changing device naming and preference
1. Click Application Settings > Network > Device Name Preference.
2. Select the naming preference.
Configuring users and user settings
In OME–Modular, you can create up to 64 local users and assign them specific roles and privileges. Using the options available
under Application Settings > Users, you can add and edit users, import a directory group, and view and terminate active user
sessions.
NOTE: You can create, delete, enable, or disable users only if you have the security setup privilege.
Viewing and editing user accounts
1. Click Application Settings > Users
On this page, you can view a list of users accounts and their roles, the user types, and whether the account is enabled or
not.
2. Select a user and click Edit on the right side of the page.
3. Edit the required settings.
NOTE: You can change only the password of the default "root" account.
Adding users
1. Click Application Settings > Users
2. Click Add.
3. Enter the Username.
The default username is "root", and you cannot edit it. You cannot disable the default account or edit the role associated
with the default account. The length of the username can be 1-16 characters long and contain white spaces and
alphanumeric characters. The special characters - §, ", /, :, @, and ` are not supported.
NOTE:
For the OME–Modular serial interface, ensure that the length of the local or remote username does not exceed
35 characters.
NOTE: Do not use "system" as a username.
4. Enter the Password and Confirm Password.
The password can be 8-32 characters long and contain at least one of the following:
● Number
● Special character—The supported special characters are - +, &, ?, >, -, }, |, ., !, (, ', ,, _, [, ", @, #, ), *, ;, $, ], /, %, =,
<, :, {, I
● Uppercase letter
● Lowercase letter
5. Select a role.
6. Select Enabled to enable the account immediately after you create it.
NOTE: For more information about the fields, see the integrated help in the OME–Modular web interface.
28 Logging in to OME-Modular