
Users Guide
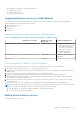

Table Of Contents
- Dell EMC OpenManage Enterprise-Modular Edition for PowerEdge MX7000 Chassis User's Guide
- Contents
- Overview
- Updating firmware for PowerEdge MX solution
- MX7000 Solution Baselines
- Upgrading ethernet switch using DUP
- OME-Modular licenses
- Logging in to OME-Modular
- Logging in to OME–Modular as local, Active Directory, or LDAP user
- Logging in to OME-Modular using OpenID Connect
- OME-Modular home page
- Viewing device health
- Setting up chassis
- Initial configuration
- Configuring chassis settings
- Managing chassis
- Chassis groups
- Controlling chassis power
- Backing up chassis
- Restoring chassis
- Exporting chassis profiles
- Managing chassis failover
- Troubleshooting in chassis
- Blinking LEDs
- Interfaces to access OME-Modular
- Viewing chassis hardware
- Viewing chassis alerts
- Viewing chassis hardware logs
- Configuring OME–Modular
- Viewing current configuration
- Configuring users and user settings
- Configuring login security settings
- Configuring alerts
- Managing compute sleds
- Managing Profiles
- Managing storage
- Managing templates
- Managing identity pools
- Ethernet IO Modules
- MX Scalable Fabric architecture
- SmartFabric Services
- Managing networks
- Managing Fibre Channel IOMs
- Managing firmware
- Monitoring alerts and logs
- Monitoring audit logs
- Use case scenarios
- Troubleshooting
- Storage
- Firmware update is failing
- Storage assignment is failing
- SAS IOM status is downgraded
- SAS IOM health is downgraded
- Drives on compute sled are not visible
- Storage configuration cannot be applied to SAS IOMs
- Drives in OpenManage are not visible
- iDRAC and OpenManage drive information do not match
- The assignment mode of storage sled is unknown
- Unable to access OME-Modular using Chassis Direct
- Troubleshooting lead chassis failure
- Storage
- Recommended slot configurations for IOMs
- Creating validated firmware solution baseline using Dell Repository Manager
- Upgrading networking switch using different OS10 DUP versions
- Upgrading networking switch using CLI

The Import Directory window is displayed.
2. From the Directory Source drop-down, select the source from which you want to import the AD or LDAP.
3. Under Available Groups, you can search for directory groups.
In the Find a Group text box, enter the first few letters of the group name available in the tested directory. A list of all
groups names that begin with the text you entered, is displayed below under the GROUP NAME column.
4. Select a group and click >>.
The selected group is displayed under Groups to be Imported.
To remove groups, select the check box corresponding to the group you want to remove and click <<.
5. Click the check box corresponding to the group and from the Assign Group Role drop-down, select the role that you want
to assign to the group and click Assign.
The users in the group under the selected directory service are assigned to the selected user roles.
6. Repeat steps 3, 4, and 5, if required.
7. Click Import.
The directory groups are imported and displayed in the Users list. However, all users in those groups use their domain
username and credentials to log in to OME-Modular.
Logging in to OME-Modular using OpenID Connect
The OpenID Connect multifactor authentication feature allows the users who are registered with OpenID Connect (OIDC)
Provider, to access the OME-Modular web interface. For the registration, the OIDC configuration document is first queried
using a RESTful API URI. The information that is obtained from the query is used to log in to OME-Modular.
NOTE:
When you log in using OpenID Connect Provider credentials, the username is displayed in the
name@ProviderName@Sub format which may result in some extra characters with the username.
NOTE: Dell Technologies recommends that you use DNS name while configuring the OIDC server and DNS name in the
discovery URI, instead of IP address. Using DNS name helps avoid limitations in some OIDC servers where dynamic client
registration fails when a combination of IPv6 and initial access token is used.
Important notes
● You must have the SECURITY_SETUP privilege to add, modify, and delete OIDC Providers. You can add maximum of four
OIDC Providers on OME-Modular. The Add option is disabled if there are already four OIDC Providers added.
● When you perform add or join chassis group operation with OIDC providers that are configured in lead or member chassis,
ensure that the OIDC server is reachable from the chassis.
● If the OIDC server is not reachable, the registration status is displayed as failed even if the OIDC providers are successfully
propagated from lead to member when the user authentication option is enabled. For any operations related to OIDC
providers in the lead or member chassis, the communication between OIDC server and chassis must be successful.
● During the firmware upgrade process, OIDC registration may fail with which the token may expire. In this scenario, re-
register the OIDC provider after the firmware upgrade process.
● OIDC users who are registered with PingFederate may have to re-register with OIDC provider, as the following actions may
reset the Open ID client policy that is associated with the client to Default.
○ Firmware upgrade
○ Change in network configuration
○ Change in SSL certificate
● The re-registration process with OIDC provider might reset to the default policy that is configured in the PingFederate. To
avoid security concerns post any of the re-registration events, the administrator must reconfigure all the OpenManage
Enterprise Client IDs on the PingFederate site. Also, it is highly recommended that client IDs are created only for
administrator users with Ping federate until this issue is resolved.
NOTE:
When you downgrade the management module firmware from 1.30.10 to 1.30.00, the verified OpenID Connect user
details are not retained.
Following are the predefined roles that must be configured in the OIDC Provider for OIDC users to log in to OME-Modular:
30
Logging in to OME-Modular