
Install Guide

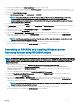
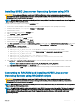

To convert from DTK to RACADM deployment and to install SUSE Linux Enterprise Server using the suseinst.sh script:
1 On the source system, navigate to the location of the required SUSE Linux Enterprise Linux operating system image.
2 Perform the steps 2 to 11 from the section Installing SUSE Linux server Operating System using DTK.
3 From /opt/dell/toolkit/converter, run the command python dtktoracadm.py or python dtktoracadm.py
linux_scripts.lst, where linux_scripts.lst is the input le which contains the list of script les to be converted to
equivalent RACADM scripts.
The RACADM converted scripts are available in /opt/dell/toolkit/converter/racscripts.
4 From /opt/dell/toolkit/converter/racscripts/, run the partcfg.sh script to create the Dell utility partition and OS partition in BIOS or
UEFI mode.
NOTE: Ensure that the correct device is set to DT_HD, DT_OS_DISK, and DT_OS_PART.
5 Run /suseinst.sh script, from /opt/dell/toolkit/converter/racscripts.
The server reboots to the grub prompt. The SUSE Linux Enterprise Linux operating system unattended installation is initiated.
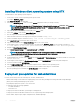
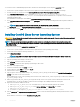
Installing CentOS Linux Server Operating System
CAUTION: Do not change the bootmode before executing installation scripts using syscfg. If you do, reboot the system and start
executing installation scripts.
NOTE: See your operating system documentation for instructions on modifying the options in the ks.cfg/ks-centos
x
.cfg/
ks_centos
x
_ue.cfg le to customize the scripted installation of your operating system, where
x
indicates the version of the
operating system.
To install CentOS Linux using the centinst6.sh/ centinst7.sh script:
1 On the source system, navigate to the location of the required CentOS Linux operating system image.
2 Create a NFS share using the following command: vi /etc/exports.
3 Share /home/centosshare.
NOTE
: If the folder you want to share is /home, then the /etc/exports le must contain the “/home *(rw)” line.
4 Restart the NFS service.
5 Copy the operating system image to the NFS share.
6 Copy initrd.img for CentOS Linux to NFS share.
7 Copy vmlinuz from CentOS Linux operating system image to NFS share.
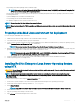
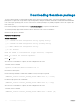
8 Boot DTK on the target machine.
9 Create the virtual disk using the raidcfg command.
10 Create a directory under /tmp. For example, os_src.
11 Mount the NFS Share to /tmp/os_src.
12 Copy ks.cfg/ks-centosx.cfg (in BIOS mode) or ks_ue.cfg/ks_centosx_ue.cfg (in UEFI mode) from /opt/dell/toolkit/template/
congs to NFS share on the source machine.
Here, x indicates the version of the operating system. In BIOS mode, rename the ks_centosx.cfg to ks.cfg. In UEFI mode, rename the
ks_centosx_ue.cfg to ks.cfg.
13 Edit ks.cfg (in BIOS mode) or ks_centosx_ue.cfg (in UEFI mode) on the source system, where x indicates the version of the
operating system. Set the NFS IP address (where CentOS Linux images are available) and the NFS share path.
14 Export the environment variables as follows:
a Run export DT_OS_DISK=/dev/sda on the disk device on which the Dell utility partition was created.
b Run export DT_OS_SRC=/tmp/os_src where vmlinuz, initrd.img, and kickstart le are available.
c Run export DT_HD=/dev/sda.
d For CentOS 7.x , run export DT_OS_NFS_LOC=<IP address of NFS>:/<path to os source>.
15 Run the partcfg.sh (at /opt/dell/toolkit/template/scripts/) script to create the Dell utility partition and OS partition in BIOS or UEFI
mode.
Ensure that the correct device is set to DT_HD and DT_OS_DISK..
12
Introduction