
Users Guide

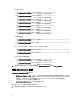

– omsalauncher_linux.cgi
– omsalauncher_nt.cgi
– idraclauncher_linux.cgi
– idraclauncher_nt.cgi
– cmclauncher_linux.cgi
– cmclauncher_nt.cgi
– vrtxcmclauncher_linux.cgi
– vrtxcmclauncher_nt.cgi
– draclauncher_linux.cgi
– draclauncher_nt.cgi
– kblauncher_linux.cgi
– kblauncher_nt.cgi
– eqllauncher_nt.cgi
– eqllauncher_linux.cgi
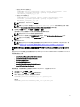
• dell_config.properties — 包含加密的 SNMP 团体字符串。
• dell_OMNIbus_Connection_SNMP_Configurator_v_2_1.jar — 配置 SNMP 团体名称字符串。
• dell_OMNIbus_Connection_SNMP_Helper_v_2_1.jar — 启动 OpenManage Server Administrator (OMSA)、
Integrated Dell Remote Access Controller (iDRAC)、Dell CMC、VRTX CMC 和 DRAC (iDRAC6、DRAC5 和
DRAC/MC) URL。
• delldevice_int_webgui.ver — 用于 Web GUI 集成的版本文件。
• export.xml — 用于注册 CGI 脚本的导出菜单和工具。
• snmp4j-2.1.0.jar — SNMP Helper 使用此文件与 Dell 设备建立 SNMP 通信。
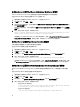
在托管 Web GUI 的系统上部署 Dell 集成组件:
1. 在安装 Web GUI 组件的系统上的 <Web GUI home directory> 下,复制
dell_OMNIbus_Connection_SNMP_Configurator_v_2_1.jar、dell_OMNIbus_Connection_SNMP_Helper_v_2_1.jar,
snmp4j-2.1.0.jar 和 dell_config.properties 文件。
2. 使用 Dell SNMP Configurator 公用程序配置 SNMP 团体。有关更多信息,请参阅 Dell SNMP Configurator 公
用程序。
3. 在安装 Web GUI 组件的系统上的 <Web GUI home directory> 中,复制 delldevice_int_webgui.ver 文件。
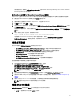
4. 找到 webgui_integration 文件夹的解压位置,导航至其中的导入文件夹,并对每个集成运行以下命令:
在运行 Windows 的系统上:
<Web GUI home directory>\waapi\bin\runwaapi -host <hostname> -user <Web GUI
username> -password <Web GUI password> -file export.xml
在运行 Linux 的系统上:
<Web GUI home directory>/waapi/bin/runwaapi -host <hostname> -user <Web GUI
username> -password <Web GUI password> -file export.xml
5. 如果将 Web GUI 组件安装到了非默认位置,或运行 Windows 的系统上的 %NCHOME%\..\tipv2、运行
Linux 的系统上的 $NCHOME\..\tipv2 之外的位置,请运行以下命令:
在运行 Windows 的系统上:
ln –sf $NCHOME/../tipv2 <Actual TIPHOME location>
在运行 Linux 的系统上:
mklink /J %NCHOME%\..\tipv2 <Actual TIPHOME location>
16