
Owner's Manual
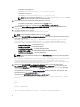
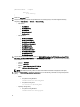


Table Of Contents
- Dell OpenManage Connection Version 1.0 for IBM Tivoli Network Manager (ITNM) IP Edition 3.9 Installation Guide
- Introduction
- Installing Dell OpenManage Connection for Network Manager
- Configuring Dell Connections
- Configuring Dell Connections License Manager (DCLM) Parameters
- Configuring Database Parameters
- Configuring WS-MAN Parameters
- Changing the Warranty URL
- Configuring Dell OpenManage Essentials Launch Tool
- Configuring Dell OpenManage Power Center Console Launch Tool
- Configuring Dell OpenManage Web Server Administrator (DWS) Console Launch Tool
- Configuring Dell Connections License Manager (DCLM) Tool
- Configuring Dell Modular Disk Storage Manager Console Launch Tool
- Uninstalling Dell OpenManage Connection for Network Manager
- Appendix
- Getting Help

For information on the contents of the ncimMetaData.xml file that you must insert, see the section “Dell Specified
Changes for ncimMetaData.xml” in Appendix.
4. Insert the content of the file Dell-OMC-ITNM-TIP-Server-Integration\dynamictemplates\ip_default.xml to the
%NCHOME%\precision\profiles\TIPProfile\etc\tnm\dynamictemplates\ip_default.xml file.
For information on the contents of the ip_default.xml file that you must insert, see the section “Dell Specified
Changes for ip_default.xml” in Appendix.
5. Navigate to Dell-OpenManage-Connection-for-ITNM-1.0\Dell-OMC-ITNM-TIP-Server-Integration\menus and insert
contents of the
ncp_topoviz_device_menu.xml file to %NCHOME%\precision\profiles\TIPProfile\etc\tnm\menus
\ncp_topoviz_device_menu.xml before the end of the definition (</definition>) tag.
For information on the contents of the ncp_topoviz_device_menu.xml file that you must insert, see the section “Dell
Specified Changes for ncp_topoviz_device_menu.xml ” in Appendix.
6. Copy the ncp_delltools.xml file to %NCHOME%\precision\profiles\TIPProfile\etc\tnm\menus folder.
7. Navigate to the tools folder and copy the following files to the %NCHOME%\precision\profiles\TIPProfile\etc\tnm
\tools folder.
– ncp_dell_omsa_launch.xml— For launching the OpenManage Server Administrator console
– ncp_dell_dws_launch.xml— For launching the OpenManage Server Administrator Web Server console
– ncp_dell_idrac7_launch.xml — For launching the iDRAC7 console
– ncp_dell_drac_launch.xml — For launching DRAC consoles
– ncp_dell_cmc_launch.xml — For launching CMC console
– ncp_dell_vrtx_cmc_launch.xml — For launching VRTX CMC console
– ncp_dell_dclm_launch.xml— For launching DCLM console
– ncp_dell_eql_console_launch — For launching the EqualLogic console
– ncp_dell_mdarray_console_launch — For launching the Dell PowerVault Modular Disk Storage Manager
console
– ncp_dell_ome_launch.xml — For launching the OpenManage Essentials console
– ncp_dell_ompc_launch.xml — For launching the OpenManage Power Center console
– ncp_dell_warranty_info.xml— For launching the Dell Warranty Information page
8. Navigate to the Dell-Utilities folder and copy the dell folder to %NCHOME%\precision\ folder.
NOTE: This step is not applicable for a standalone setup.
9. Navigate to the cgi-bin folder, open the delltoollauncher.cgi file and add the perl binary path (absolute) in the first
line, based on the operating system installed and the install location of the perl. The default perl path location
installed with Network Manager is:
–
On systems running Windows
— %NCHOME%\netcool\precision\perl\bin\perl.exe
–
On systems running Linux
— $NCHOME/precision/perl/bin/perl
10. Navigate to the configuration folder and run the following command:
<Web GUI Install Location>\waapi\bin\runwaapi -host <IP address/host name> -
user <user name> -password <Web GUI password> -file export.xml.
NOTE: To run WAAPI commands, users must be a member of the Webtop Administrator role.
11. For distributed servers, from the core component’s /opt/IBM/tivoli/netcool/etc/security/keys/ folder, copy the
conf.key file to the%NCHOME%\etc\security\keys\ folder.
NOTE: Before copying the conf.key file from the core component, make a backup of the original conf.key in
the TIP Server.
12. Navigate to the Dell-OMC-ITNM-TIP-Server-Integration folder and copy the dellomc_int_itnm_tip_server.ver file to
the “%NCHOME%\precision” folder.
16