
Users Guide

Using the BMC Management Utility 45
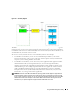
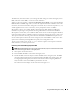
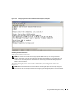
The SOL Proxy main menu allows you to change the SOL settings of a remote managed system’s
BMC, reboot the remote BMC, or activate console redirection.
When you select menu option 1,
Connect to the Remote Server’s BMC
, you are prompted for the
BMC IP address and BMC login. After you enter the required information and make a successful
connection, the internal state SLP is changed to “connected.” If you select menu options 2, 3, or 4,
and the application state is not “connected,” you are prompted to connect to a BMC.
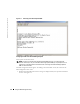
Menu option 2 allows you to enable, disable, and configure the SOL defaults, including the
minimum user privilege level required for activating SOL and the communication baud-rate.
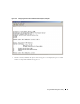
Menu options 3 and 4 allow you to establish a SOL remote console session through the SOL Proxy
main menu. Menu option 3 establishes a SOL session without changing the remote system’s state.
This option is ideal for connecting to the Microsoft SAC/EMS or the Red Hat Enterprise Linux
console. Menu option 4 reboots the remote managed system and establishes a SOL session. This
option is best suited for performing BIOS setup and system configuration tasks.
To exit an active SOL session, use the <~><.> character sequence. This sequence terminates
SOL and returns you to the top-level menu.
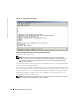
Connecting to the Remote Managed System’s BMC
NOTE: While multiple SOL sessions can be active at the same time, only one console redirection session
can be active at any given time for a managed system.
1
Select option
1
in the main menu.
2
Enter the BMC IP address of the remote managed system.
3
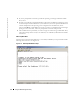
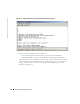
Provide the BMC username and password for the BMC on the managed system. The BMC
username and password must be assigned and stored in the BMC non-volatile storage. See
"Configuring Your Managed System" for more information about configuring BMC users.
Only one SOL session with one BMC is permitted at one time.
The connection status displays on the main menu. See Figure 3-11.