
Multi Functional Printer User's Guide


Table Of Contents
- Features of your new laser printer
- Safety information
- Contents
- Introduction
- Getting started
- Loading originals and print media
- Copying
- Scanning
- Basic printing
- Faxing
- Sending a fax
- Receiving a fax
- Selecting the paper tray
- Changing receiving modes
- Receiving automatically in Fax mode
- Receiving manually in Tel mode
- Receiving manually using an extension telephone
- Receiving automatically in Ans/Fax mode
- Receiving faxes using DRPD mode
- Receiving in secure receiving mode
- Activating secure receiving mode
- Receiving faxes in memory
- Other ways to fax
- Fax setup
- Using USB flash memory
- Maintenance
- Troubleshooting
- Ordering supplies and accessories
- Installing accessories
- Specifications
- Appendix
- Glossary
- Index
- Software section
- Software section Contents
- Installing Printer Software in Windows
- Basic Printing
- Advanced Printing
- Using Windows PostScript Driver
- Sharing the Printer Locally
- Scanning
- Using other software
- Using Your Printer in Linux
- Using Your Printer with a Macintosh
- Software section Index
Troubleshooting | 69
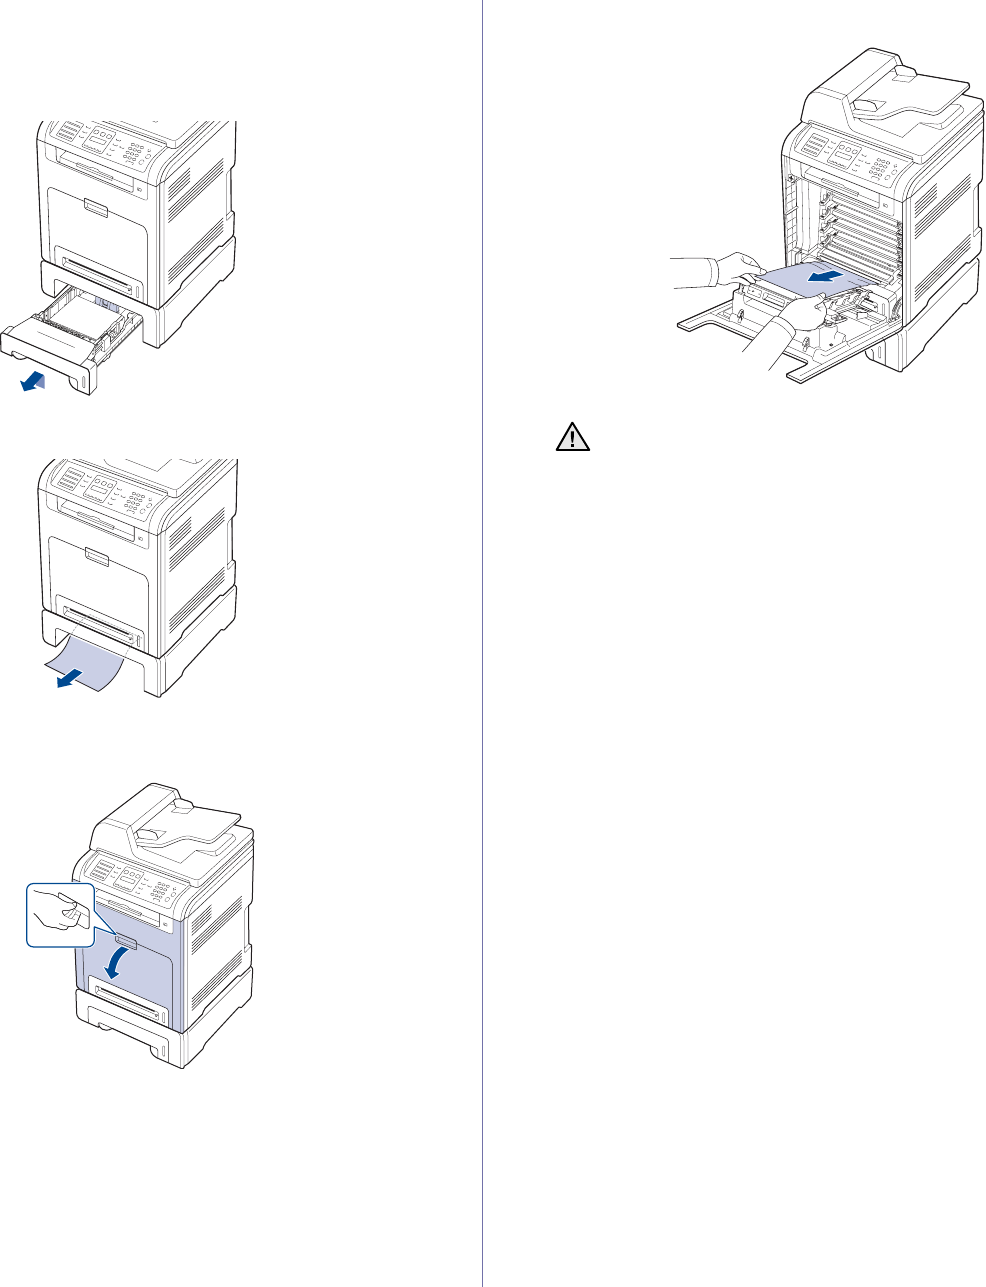
In the optional tray
If paper is jammed in the optional Tray, follow the next steps to release the
jammed paper.
1. Pull the optional Tray open. After you pull it all the way out, lift up the
front part of the tray slightly to release the tray from the printer.
2. If you see the jammed paper, remove the paper from the printer by
gently pulling it straight out as shown below.
3. Slide the tray back into the printer.
4. Open the front cover.
5. Pull the jammed paper out in the direction shown. To avoid tearing the
paper, pull it out gently and slowly.
6. Close the front cover firmly. The printer will resume printing.
If the front cover is not completely closed, the printer will not
operate.