
Multi Functional Printer User's Guide


Table Of Contents
- Features of your new laser printer
- Safety information
- Contents
- Introduction
- Getting started
- Loading originals and print media
- Copying
- Scanning
- Basic printing
- Faxing
- Sending a fax
- Receiving a fax
- Selecting the paper tray
- Changing receiving modes
- Receiving automatically in Fax mode
- Receiving manually in Tel mode
- Receiving manually using an extension telephone
- Receiving automatically in Ans/Fax mode
- Receiving faxes using DRPD mode
- Receiving in secure receiving mode
- Activating secure receiving mode
- Receiving faxes in memory
- Other ways to fax
- Fax setup
- Using USB flash memory
- Maintenance
- Troubleshooting
- Ordering supplies and accessories
- Installing accessories
- Specifications
- Appendix
- Glossary
- Index
- Software section
- Software section Contents
- Installing Printer Software in Windows
- Basic Printing
- Advanced Printing
- Using Windows PostScript Driver
- Sharing the Printer Locally
- Scanning
- Using other software
- Using Your Printer in Linux
- Using Your Printer with a Macintosh
- Software section Index
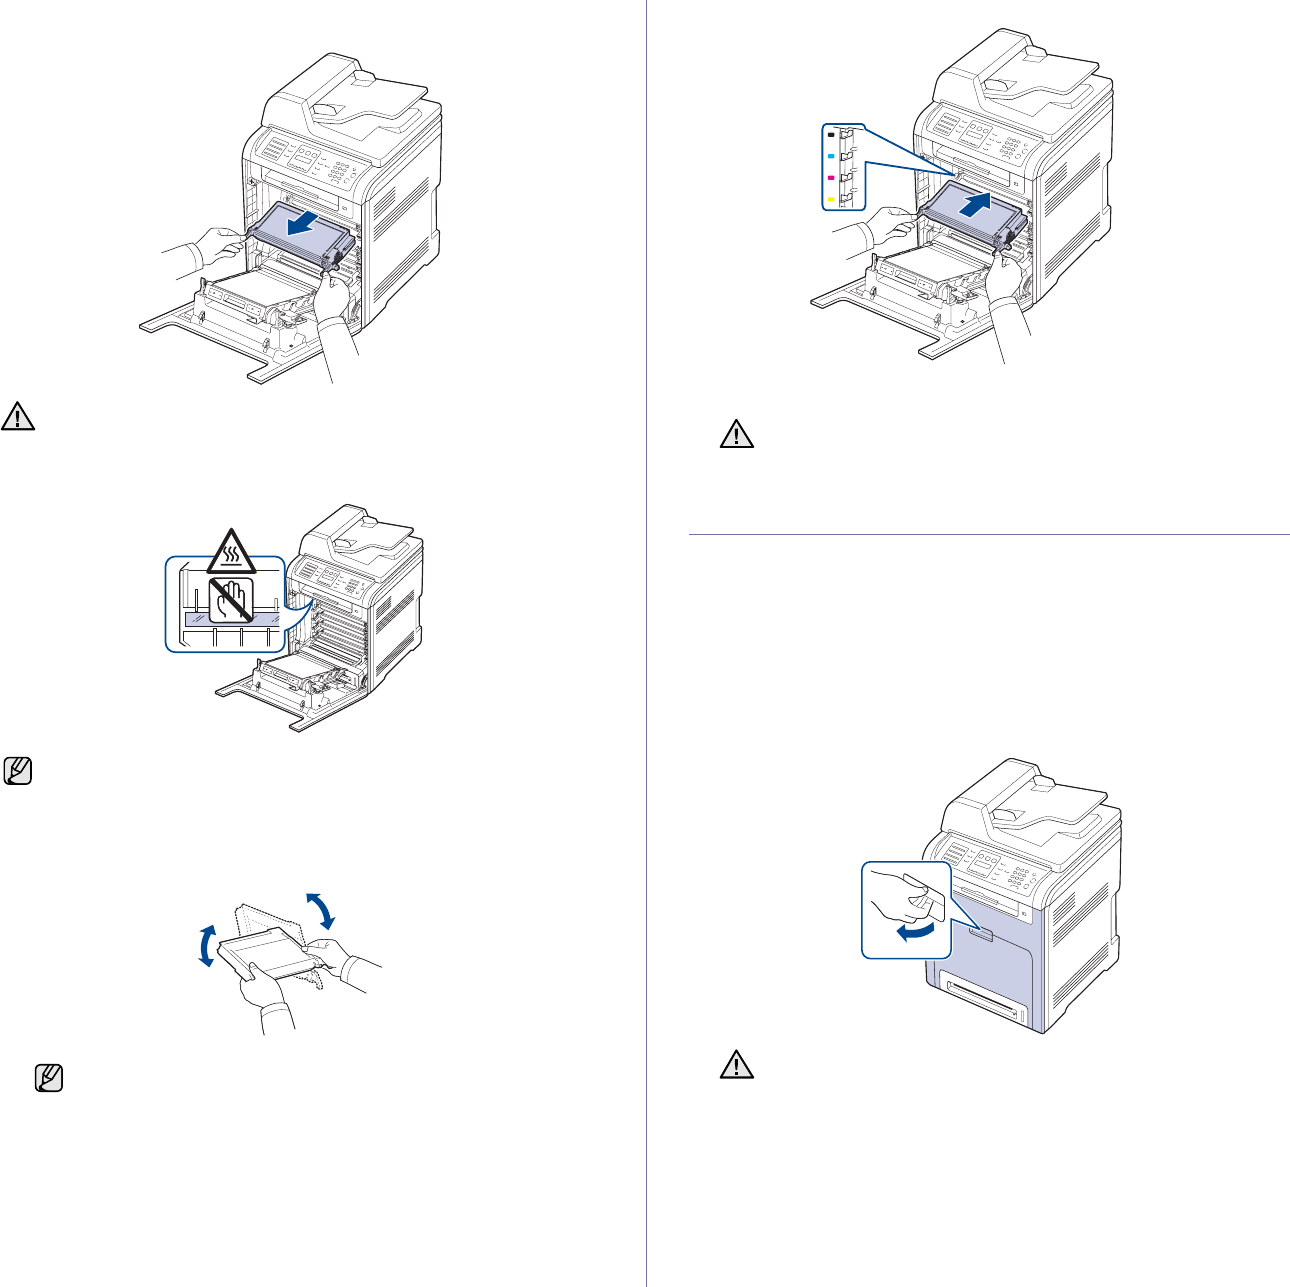
Maintenance | 59
2. Grasp the handles on the toner cartridge and pull to remove the
cartridge from the printer.
3. Holding both handles on the toner cartridge, thoroughly rock it from side
to side to evenly distribute the toner.
4. Slide the toner cartridge back into the printer.
5. Close the front cover. Ensure the cover is securely latched.
REPLACING THE TONER CARTRIDGE
The printer uses four colors and has a different toner cartridge for each one:
yellow (Y), magenta (M), cyan (C), and black (K).
• The status LED and the toner-related message on the display indicates
which each individual toner cartridge should be replaced.
• Incoming faxes are saved in memory.
At this stage, the toner cartridge needs to be replaced. Check the type of
toner cartridge for your printer (see "Supplies" on page 83).
1. Turn the printer off, then wait a few minutes for the printer to cool.
2. Using the handle, completely open the front cover.
When you open the front cover, be careful not to touch the
underneath of the control panel (the lower part of the fuser unit). The
temperature of the fuser unit might be high and could damage your
skin.
When you open the front cover and work inside the printer, it is highly
recommend that you remove the paper transfer belt first. Because the
work you do could contaminate the paper transfer belt.
If toner gets on your clothing, wipe it off with a dry
cloth and wash it in cold water. Hot water sets toner into
fabric.
If the front cover is not completely closed, the printer will not
operate.
• Do not touch the green surface, the OPC drum or the front of
each toner cartridge, with your hands or any other material. Use
the handle on each cartridge in order to avoid touching this area.
• Be careful not to scratch the surface of the paper transfer belt.
• If you leave the front cover open for more than a few minutes, the
OPC drum can be exposed to light. This will cause damage to the
OPC drum. Close the front cover should the installation need to
be halted for any reason.