
Multi Functional Printer User's Guide


Table Of Contents
- Features of your new laser printer
- Safety information
- Contents
- Introduction
- Getting started
- Loading originals and print media
- Copying
- Scanning
- Basic printing
- Faxing
- Sending a fax
- Receiving a fax
- Selecting the paper tray
- Changing receiving modes
- Receiving automatically in Fax mode
- Receiving manually in Tel mode
- Receiving manually using an extension telephone
- Receiving automatically in Ans/Fax mode
- Receiving faxes using DRPD mode
- Receiving in secure receiving mode
- Activating secure receiving mode
- Receiving faxes in memory
- Other ways to fax
- Fax setup
- Using USB flash memory
- Maintenance
- Troubleshooting
- Ordering supplies and accessories
- Installing accessories
- Specifications
- Appendix
- Glossary
- Index
- Software section
- Software section Contents
- Installing Printer Software in Windows
- Basic Printing
- Advanced Printing
- Using Windows PostScript Driver
- Sharing the Printer Locally
- Scanning
- Using other software
- Using Your Printer in Linux
- Using Your Printer with a Macintosh
- Software section Index
52 | Using USB flash memory
using USB flash memory
This chapter explains how to use a USB memory device with your printer.
This chapter includes:
• About USB memory
• Plugging in a USB memory device
• Scanning to a USB memory device
• Printing from a USB memory device
• Backing up data
• Managing USB memory
ABOUT USB MEMORY
USB memory devices are available with a variety of memory capacities to
give you more room for storing documents, presentations, downloaded
music and videos, high resolution photographs, or whatever other files you
want to store or move.
You can do the following on your printer using a USB memory device:
• Scan documents and save them on a USB memory device.
• Print data stored on a USB memory device.
• Back up Address Book / Phone Book entries and the system
settings of your printer.
• Restore backup files to the printer’s memory.
• Format the USB memory device.
• Check the available memory space.
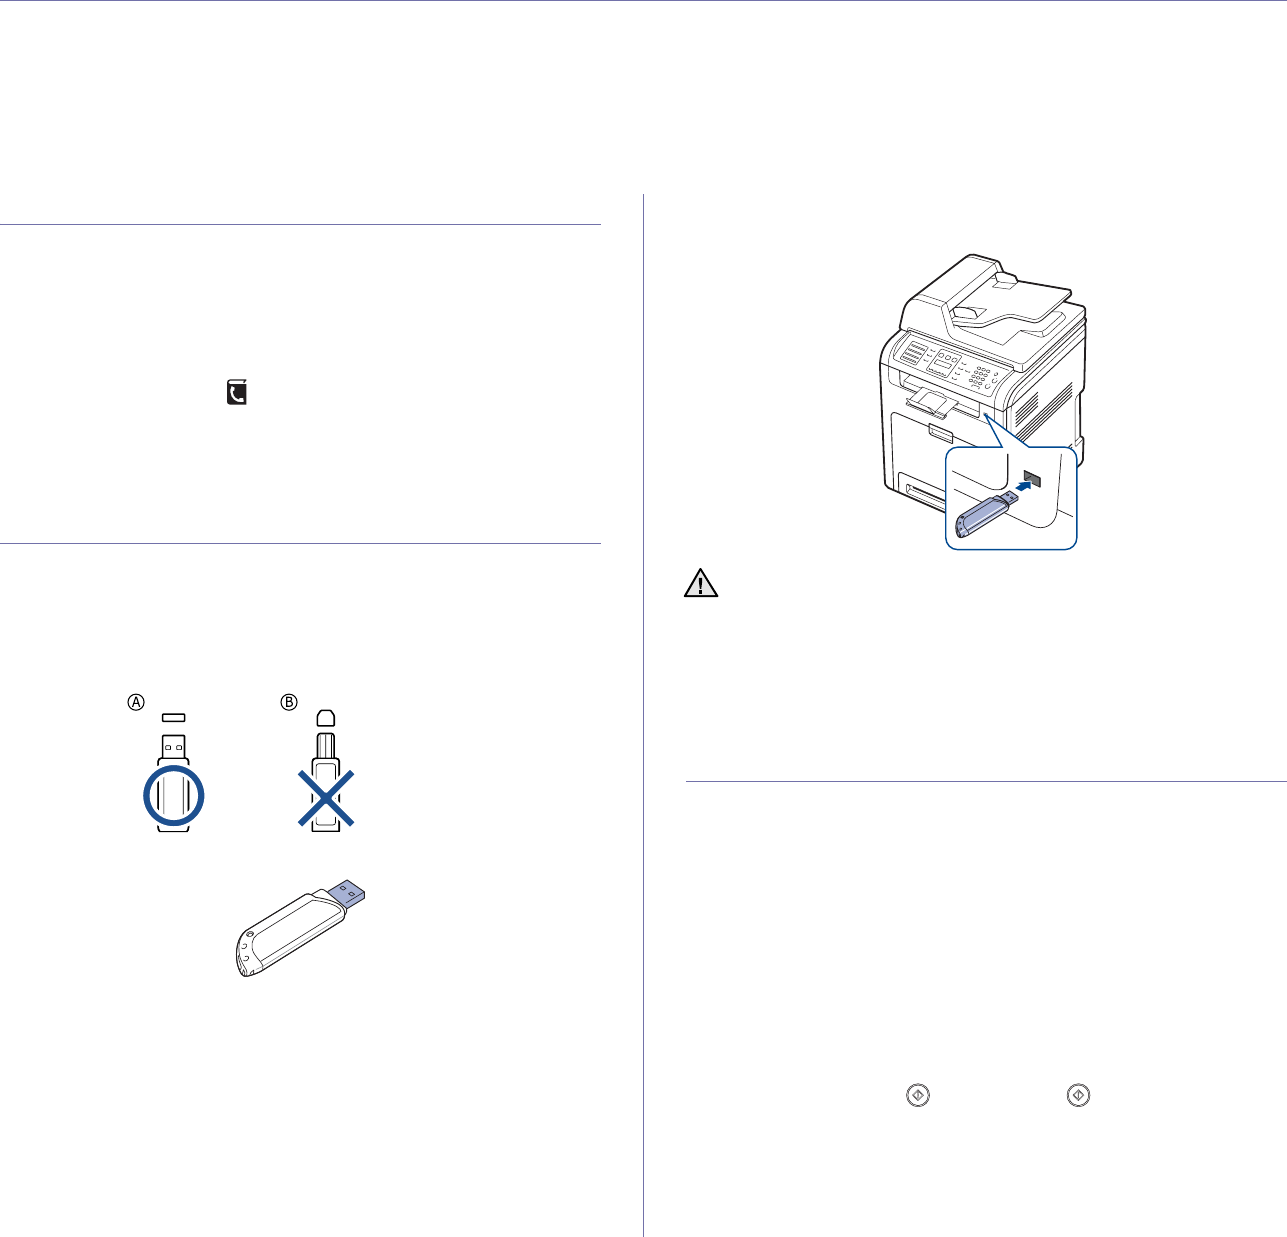
PLUGGING IN A USB MEMORY DEVICE
The USB connector on the front of your printer is designed for USB V1.1
and USB V2.0 memory devices. Your printer supports USB memory devices
with FAT16/ FAT32 and sector size of 512 bytes.
Check your USB memory device’s file system from your dealer.
You must use only an authorized USB memory device with an A plug type
connector.
Use only a metal/shielded USB memory device.
Insert a USB memory device into the USB connector on the front of your
printer.
SCANNING TO A USB MEMORY DEVICE
You can scan a document and save the scanned image onto a USB
memory device. There are two ways of doing this: you can scan to the
device using the default settings, or you can customize your own scan
settings.
Scanning
1. Insert a USB memory device into the USB connector on your printer.
2. Load originals face up into the DADF, or place a single original face
down on the scanner glass.
For details about loading an original. See "Loading originals" on
page 23.
3. Press Scan/Email.
4. Press OK when Scan to USB appears on the bottom line of the display.
5. Press OK, Color Start () or Black Start () when
USB appears.
Regardless of the button you press, the color mode is decided as
customized. See "Customizing scan to USB" on page 53.
Your printer begins scanning the original, and then asks if you want to
scan another page.
• Do not remove the USB memory device while the printer is in
operation, or writing to or reading from USB memory. The printer
warranty does not cover damage caused by use’s misuse.
• If your USB memory device has certain features, such as security
settings and password settings, your printer may not automatically
detect it. For details about these features, see the device’s User’s
Guide.