
Multi Functional Printer User's Guide


Table Of Contents
- Features of your new laser printer
- Safety information
- Contents
- Introduction
- Getting started
- Loading originals and print media
- Copying
- Scanning
- Basic printing
- Faxing
- Sending a fax
- Receiving a fax
- Selecting the paper tray
- Changing receiving modes
- Receiving automatically in Fax mode
- Receiving manually in Tel mode
- Receiving manually using an extension telephone
- Receiving automatically in Ans/Fax mode
- Receiving faxes using DRPD mode
- Receiving in secure receiving mode
- Activating secure receiving mode
- Receiving faxes in memory
- Other ways to fax
- Fax setup
- Using USB flash memory
- Maintenance
- Troubleshooting
- Ordering supplies and accessories
- Installing accessories
- Specifications
- Appendix
- Glossary
- Index
- Software section
- Software section Contents
- Installing Printer Software in Windows
- Basic Printing
- Advanced Printing
- Using Windows PostScript Driver
- Sharing the Printer Locally
- Scanning
- Using other software
- Using Your Printer in Linux
- Using Your Printer with a Macintosh
- Software section Index
Getting started | 17
getting started
This chapter gives you step-by-step instructions for setting up the printer.
This chapter includes:
• Setting up the hardware
• Printing a demo page
• Setting up the network
• System requirements
• Installing the software
• Printer's basic settings
SETTING UP THE HARDWARE
This section shows the steps to set up the hardware which is explained in
the Quick Install Guide. Ensure you read Quick Install Guide and complete
following steps.
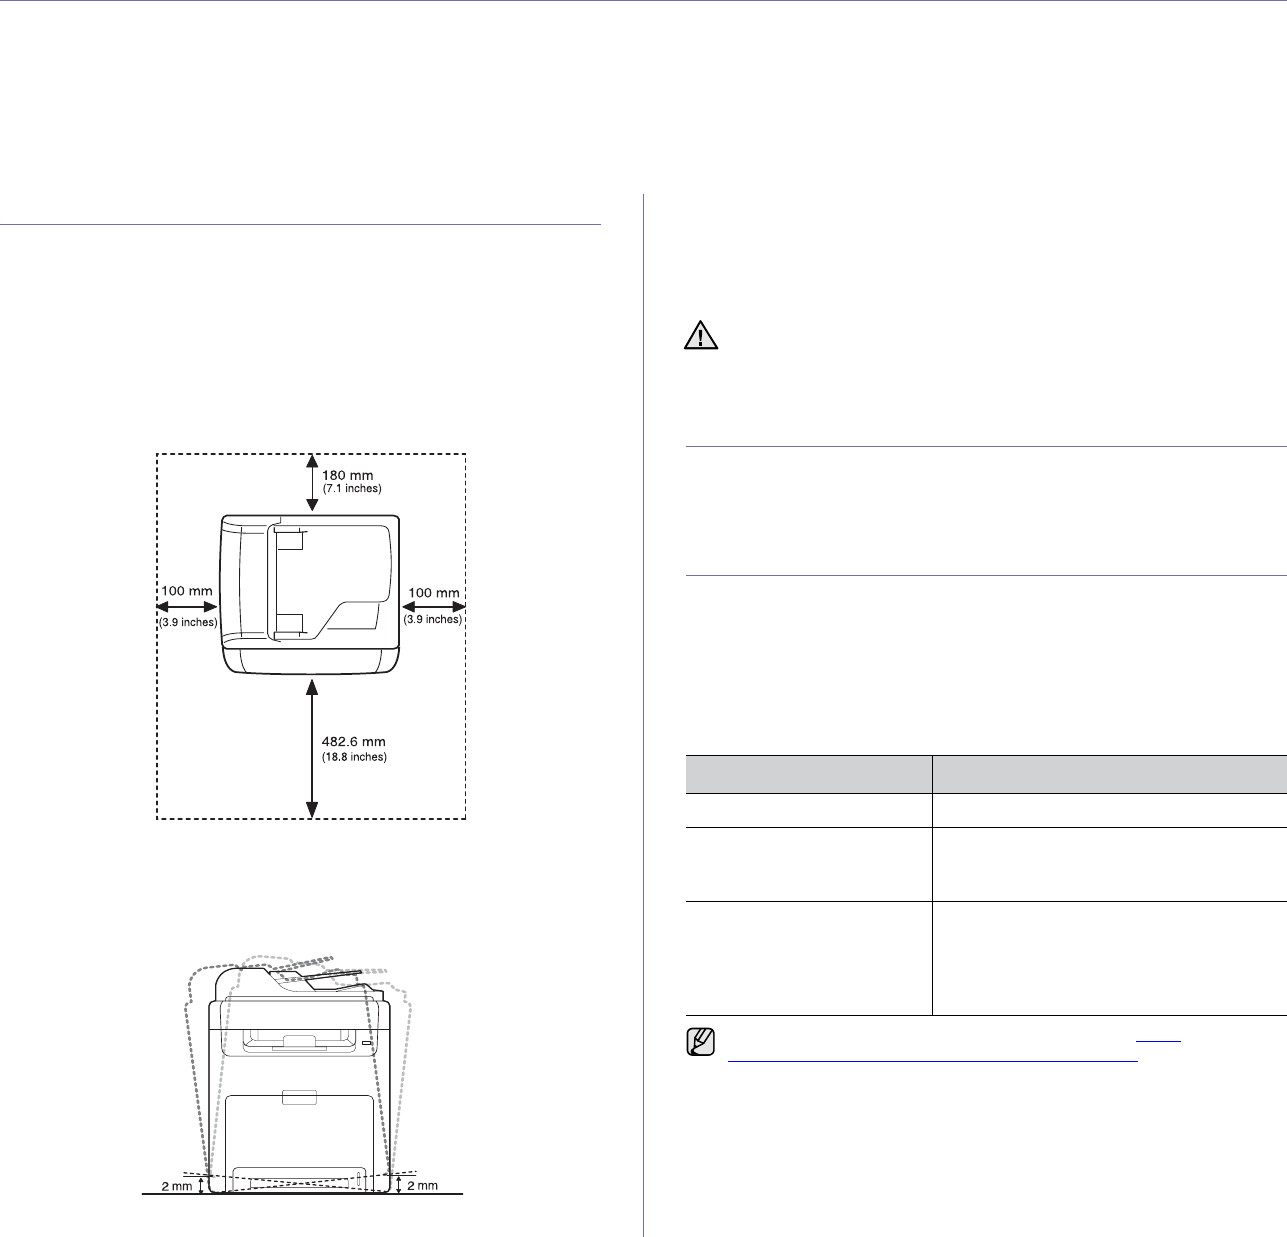
1. Select a stable location.
Select a level, stable place with adequate space for air circulation. Allow
extra space to open covers and trays.
The area should be well-ventilated and away from direct sunlight or
sources of heat, cold, and humidity. Do not set the printer close to the
edge of your desk or table.
Printing is suitable for altitudes under 1,000 m (3,281 ft). Refer to the
altitude setting to optimize your printing. See "Altitude adjustment" on
page 20 for more information.
Select a flat, stable surface that is not inclined greater than 2 mm (0.08
inch). Otherwise, printing quality may be affected.
2. Unpack the printer and check all the enclosed items.
3. Remove the tape that is holding the printer tightly.
4. Install the toner cartridge.
5. Load paper (see "Loading paper" on page 27).
6. Ensure that all the cables are connected to the printer.
7. Turn the printer on.
PRINTING A DEMO PAGE
Print a demo page to ensure that the printer is operating correctly.
To print a demo page:
In Ready mode, press and hold the OK button for about 2 seconds.
SETTING UP THE NETWORK
You need to set up the network protocols on the printer to use it as your
network printer. You can set up the basic network settings through the
printer's control panel.
Supported operating environments
The following table shows the network environments supported by the
printer:
When you move the printer, do not tilt or turn it upside down.
Otherwise, the inside of the printer may be contaminated by toner,
which can damage the printer or result in bad print quality.
ITEM REQUIREMENTS
Network interface • Ethernet 10/100 Base-TX
Network operating system • Windows 2000/XP/2003/2008/Vista
• Various Linux OS
• Mac OS X 10.3 ~ 10.5
Network protocols • TCP/IP on Windows
•IPP
•SNMP
• DHCP
•BOOTP
If you want to set up DHCP network protocol, go to http://
developer.apple.com/networking/bonjour/download/, select the
Bonjour program that is appropriate for your computer operating
system and install the program. This program will allow you to set
network parameters automatically. Follow the instructions in the
installation window. This program does not support Linux.