
Setup Guide


The Custom Setup screen is displayed.
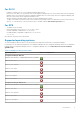
4. In Custom Setup, select the feature that you did not install earlier.
5. Click Next.
6. In Ready to Modify the Program, click Install to begin installing the feature.
When the installation process completes, click Finish to exit the installer.
Removing a feature that you had installed earlier
To remove a feature that you had installed earlier:
1. Run Dell_Lifecycle_Controller_Integration_3.1.xx.exe from the folder where you have extracted it.
2. Click Next.
The installer displays three options.
3. Select the Modify option.
The Custom Setup screen is displayed.
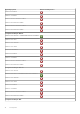
4. In Custom Setup, select the feature that you want to remove.
5. Click the feature and select the option This feature will not be available and click Next.
6. Click Install.
The installer removes the feature.
Uninstalling Dell Lifecycle Controller Integration
for Configuration Manager
To uninstall the DLCI for Configuration Manager:
1. Click Start > Control Panel > Add or Remove Programs.
2. Select Dell Lifecycle Controller Integration 3.1 and click Remove.
3. Follow the instructions to complete the uninstallation.
Or, if you are uninstalling by using the package that you downloaded and if UAC is enabled, see Working With DLCI on a User Account
Control Enabled System, else double-click Dell_Lifecycle_Controller_Integration_3.1.xx.exe, select Remove, and
follow the instructions on the screen.
Installing DLCI for Configuration Manager
17