
Setup Guide
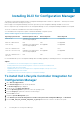


Installing Dell Lifecycle Controller Integration for
Configuration Manager on a UAC-enabled system
1. Right-click Command Prompt and select Run As Administrator.
2. Run Dell_Lifecycle_Controller_Integration_3.1.xx.exe from the folder where you have extracted it.
3. Follow the instructions in the installation wizard to install Dell Lifecycle Controller Integration on the system.
Using the repair option in the installer
1. To repair the installation of DLCI for Configuration Manager, if UAC is enabled, see Working With DLCI on a User Account Control
Enabled System, else double-click Dell_Lifecycle_Controller_Integration_3.1.xxx.exe.
The Welcome screen is displayed.
2. Click Next.
3. In Program Maintenance, select Repair, and then click Next.
The Ready to Repair the Program screen is displayed.
4. Click Install.
A progress screen displays the progress of the installation. After the installation is complete, the InstallShield Wizard Completed
window is displayed.
5. Click Finish.
Upgrading Dell Lifecycle Controller Integration for
Configuration Manager from a previous version
NOTE:
• Before upgrading to the latest version of Configuration Manager from a previous version of Configuration Manager,
you must first uninstall DLCI, and delete the boot images. After upgrading the Configuration Manager to the latest
version, install DLCI. For information about upgrading Configuration Manager from previous versions, see
technet.microsoft.com/en-us/library/jj822981.aspx.
• DLCI for Configuration Manager supports upgrading only from version 3.0 to later versions.
If you have lower version installed, you must first uninstall the lower version and then install version 3.1. When you
uninstall the lower version, the previous settings are not retained and you must rediscover the target systems after
you install version 3.1. For example, as DLCI for Configuration Manager does not support upgrade from DLCI 2.2 to
DLCI 3.1, uninstall DLCI 2.2 and then install DLCI 3.1.
• While upgrading to DLCI 3.1 from DLCI 3.0, if you want to make a configuration change such as, adding or deleting
SMS providers, you must uninstall DLCI 3.0, make the configuration change, and then install DLCI 3.1.
Prerequisites for upgrading
Before you upgrade to Dell Lifecycle Controller Integration version 3.1 for Configuration Manager, you must upgrade the firmware on the
target systems. If the blade servers are part of the Chassis, then upgrade the Chassis Management Controller (CMC) firmware before
upgrading other firmware.
If you are using Dell Update Packages (DUPs) to perform the updates on the yx1x (Dell’s 11th generation of PowerEdge servers), then
update firmware as follows:
NOTE: In the server name format
yxxx
; y denotes alphabets, for example M, R, or T; and x denotes numbers.
1. Upgrade the BIOS of the target systems to the latest version.
2. Upgrade Lifecycle Controller on the target systems to version 1.5.5 or later. For more information, see the Dell Lifecycle Controller
USC/USC-LCE Version 1.5 User’s Guide available at dell.com/support/manuals. To upgrade Lifecycle Controller, use the Firmware
Upgrade Tool in Dell Lifecycle Controller Integration version 3.1 for Configuration Manager. Lifecycle Controller version 1.5.5 is
delivered as part of iDRAC version 1.9 for rack and tower servers and iDRAC version 3.4 for blade servers.
3. Upgrade iDRAC on the target systems to version 1.9 or later for monolithic systems and iDRAC version 3.4 or later for modular
systems. For more information, see the Integrated Dell Remote Access Controller 6 (iDRAC6) Version 1.9 User’s Guide, the Integrated
Installing DLCI for Configuration Manager
15