Dell Lifecycle Controller Integration Version 3.
備註、提醒及警告 備註: 「備註」表示可以幫助您更有效地使用電腦的重要資訊。 警示: 「提醒」說明可能會損壞硬件或導致數據遺失,並告訴您如何避免問題。 警告: 「警告」表示有可能導致財產損失、人身傷害甚至死亡。 © 2009 - 2015 Dell Inc. 著作權所有,並保留一切權利。 本產品受美國和國際版權與智慧財產權法保護。Dell™ 及 Dell 徽標是 Dell Inc.在美國及/或其他司法轄區的商標。此處提及的所有其他標誌和名稱可能都是其各自公司的商標。 Rev.
Contents 1 Introduction................................................................................................................................. 4 2 Prerequisites............................................................................................................................... 5 Configuring an account for use with discovery and handshake......................................................................................5 Configuring User Access to WMI...................................
1 Introduction Dell Lifecycle Controller Integration Version 3.1 for Microsoft System Center Configuration Manager Installation Guide provides information on software prerequisites and requirements to install, upgrade, and uninstall Dell Lifecycle Controller Integration (DLCI) for Microsoft System Center Configuration Manager.
2 Prerequisites Before you install Dell Lifecycle Controller Integration, complete the following: 1. Configure an account for use with Discovery and Handshake. For more information, see Configuring an Account for Use With Discovery and Handshake. 2. Make sure that the software prerequisites and requirements are available. For more information, see Software Prerequisites and Requirements. 3. Make sure that the component specific prerequisites are available.
Providing User Permissions for DCOM To grant user permissions for DCOM: 1. Launch dcomcnfg.exe. 2. From the left pane, in the Component Services console, expand Computers, right-click the Provisioning Server Computer, and select Properties. 3. On COM Security: • • From Access Permissions, click Edit Limits and select Remote Access. From Launch and Activation Permission, click Edit Limits and select Local Launch, Remote Launch, and Remote Activation.
• ddm.box 3. Add a configuration point to provide full control permission at this registry location: HKEY_LOCAL_MACHINE\SOFTWARE \Wow6432Node\DELL\Provisioning Service\Repository. 4. Validate these permissions by temporarily mapping a drive from the Dell Provisioning Server with user credentials, and then creating, writing, modifying, and deleting a new file. Software prerequisites and requirements Before you install DLCI for Configuration Manager, complete the following prerequisites: 1.
• • • Confirm that virtual disk is available on the target system. Servers, where ESXi are deployed, are moved to another collection Managed Dell Lifecycle Controller (ESXi). If DHCP lookup fails while deployment, then the server times out and it is not moved into Managed Dell Lifecycle Controller (ESXi). It is recommended that the network adapter is connected to the network port in the server on which the operating system is being deployed.
For DLCU • • • • Installation on primary Site Server or Configuration Manager Admin console DLCI version 3.
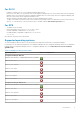
Operating Systems Windows 8 x64 Edition Windows 7 x64 Edition Windows Vista SP1 x64 Business Edition Windows Vista x64 Business Edition Windows Vista SP1 x64 Business Edition Windows Vista x64 Business Edition Configuration Manager 2012 R2 Windows Server 2012 R2— Standard and Datacenter x64 Editions Windows Server 2012 Windows Server 2008 R2 Windows Server 2008 Windows 8.
Operating Systems Dell Provisioning Service Windows Server 2012 R2 Windows Server 2012 Windows Server 2008 SP2 — Standard, Enterprise, and Datacenter x64 Editions Windows Server 2008 — Standard, Enterprise, and Datacenter x64 Editions Windows Server 2008 R2 — Standard, Enterprise, and Datacenter Editions Windows Vista SP1 x64 Business Edition Windows Vista x64 Business Edition Enabling or Disabling WMI Traffic Using Firewall If firewall is enabled on Dell Lifecycle Controller Utility for Configuration Ma
3 Installing DLCI for Configuration Manager The Dell Lifecycle Controller Integration (DLCI) for Configuration Manager installer contains two components — Dell Lifecycle Controller Utility (DLCU) and Dell Provisioning Service (DPS). DLCU is a plug-in for Configuration Manager; select this option when you have Configuration Manager installed on a site server. DPS is a component for provisioning Dell servers into Configuration Manager. For DPS, Configuration Manager installation is not required.
9. To install the package, if UAC is enabled, see Working With DLCI on a User Account Control Enabled System, else double-click Dell_Lifecycle_Controller_Integration_3.1.xx.exe. The Welcome screen is displayed. 10. Click Next. The license agreement is displayed. 11. Accept the license agreement and click Next. The Custom Setup screen is displayed. 12. Select the option to install either the Dell Lifecycle Controller Utility or the Dell Provisioning Service, or both.
In the Custom Setup Confirmation screen, the selected component is displayed. 2. Click Next. 3. In Dell Lifecycle Controller Utility User Credentials for iDRAC Access, enter the user name and password for out-of-band controller management. This account is provisioned on the iDRAC. Retain the default settings for skipping CN and CA checks. NOTE: This screen is displayed only if you are installing DLCI for Configuration Manager on a Site Server. 4. Click Next.
Installing Dell Lifecycle Controller Integration for Configuration Manager on a UAC-enabled system 1. Right-click Command Prompt and select Run As Administrator. 2. Run Dell_Lifecycle_Controller_Integration_3.1.xx.exe from the folder where you have extracted it. 3. Follow the instructions in the installation wizard to install Dell Lifecycle Controller Integration on the system. Using the repair option in the installer 1.
Dell Remote Access Controller 6 (iDRAC6) Enterprise for Blade Servers Version 3.4 User’s Guide, Integrated Dell Remote Access Controller 7 (iDRAC7) Version 1.50.50 User's Guide, and Integrated Dell Remote Access Controller 8 (iDRAC8) Version 2.00.00.00 User's Guide available at dell.com/support/home. NOTE: You cannot abort the upgrade process by closing the installation wizard.
The Custom Setup screen is displayed. 4. In Custom Setup, select the feature that you did not install earlier. 5. Click Next. 6. In Ready to Modify the Program, click Install to begin installing the feature. When the installation process completes, click Finish to exit the installer. Removing a feature that you had installed earlier To remove a feature that you had installed earlier: 1. Run Dell_Lifecycle_Controller_Integration_3.1.xx.exe from the folder where you have extracted it. 2. Click Next.
4 Troubleshooting Errors During Dell Provisioning Service (DPS) Installation on System When installing DPS on a system other than the site server, if you specify incorrect system name or user credentials for accessing the site server, the information is not authenticated by the installer, and the installation is completed. However, when DPS is trying to access the site server, failure to access the site server occurs.