
Setup Guide


4. 從 Operating System (作業系統) 下拉式清單中選取作業系統。
5. 從 Category (類別)下拉清單中,選取相關的類別。
在預設情況下會選取 All (全部)。
6. 展開 Systems Management (系統管理) 選項。
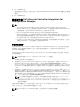
7. 在 Dell Lifecycle Controller Integration 3.0 for Microsoft System Center Configuration Manager
中,按一下 下載。
8. 下載 Dell_Lifecycle_Controller_Integration_3.0.0_Axx.zip 並將內容解壓縮至系統上的資料夾。
9. 若要安裝此套件,如果已啟用 UAC,請參閱 「Working With DLCI on a User Account Control Enabled
System」,否則請按兩下 Dell_Lifecycle_Controller_Integration_3.0.0.xx.exe。
即顯示 Welcome (歡迎) 畫面。
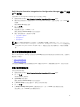
10. 按一下 下一步。
即顯示授權合約。
11. 接受授權合約並按一下 Next (下一步)。
螢幕上將會顯示 Custom Setup (自訂設定) 畫面。
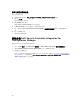
12. 選取此項可安裝 Dell Lifecycle Controller Utility 或 Dell Provisioning Service (Dell 供應服務),或安裝
兩者。
如果您在 Configuration Manager 無法使用的系統上安裝 DPS 時,可使用 DLCI for Configuration
Manager2012 選項。當您清除此選項,硬碟機上所需的空間將在 Feature Description (功能說明) 裡顯示
不正確。
您可以依據需要從以下自訂選項中選取:
• 安裝 DLCU 與 DPS
• 僅安裝 DLCU
• 僅安裝 DPS
安裝 DLCU 與 DPS
在站台伺服器或管理主控台中安裝 DLCU 與 DPS:
1. 從 Custom Setup (自訂設定) 中選取 Dell Lifecycle Controller Utility 與 Dell Provisioning Service
(Dell 供應服務),然後按一下 Next (下一步)。
將會顯示 Custom Setup Confirmation (自訂設定確認) 畫面。
2. 按一下 Next (下一步)。
即顯示 Dell Provisioning Service User Credentials for Configuration Manager Access (Configuration
Manager Access 的 Dell 供應服務使用者憑證) 畫面。
3. 執行下列其中一個步驟:
a. 在站台伺服器中,輸入新探索到的各系統 (含 iDRAC) 提供的 Dell 供應服務存取 Configuration
Manager 用的帳戶 (含所需權限),並按一下 Next (下一步)。
b. 在含有 IIS 的 Configuration Manager 管理主控台中,輸入新探索到含有 iDRAC 的各系統 提供之主要
站台伺服器名稱、使用者名稱及密碼,並按一下 Next (下一步)。
如要自動設定 Dell 供應伺服器,請選取 Automatically configure Dell Provisioning Server user
permissions (自動設定 Dell 供應伺服器使用者權限)。
註: 如果使用者名稱不屬於 SMS_Admins 群組,那麼您必須提供額外的 WMI 命名空間的權限,
如需詳細資訊,請參閱「
設定命名空間安全性並授予權限」。
即顯示 Dell Lifecycle Controller Utility User Credentials for iDRAC Access (iDRAC 存取適用的 Dell
Lifecycle Controller 公用程式使用者憑證) 畫面。
13