
Users Guide


Importing the System Profile
This feature enables you to import the backup of the firmware and configuration of a system, and restore it to the same
system where the backup was taken from.
You can use this feature only if you have taken a backup image of the system profile before.
NOTE: If you replace the motherboard of the system, make sure you re-install the hardware back in the same
location. For example, install the NIC PCI card in the same PCI slot that you used during backup.
Optionally, you can delete the current virtual disk configuration and restore the configuration from the backup image file.
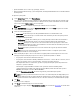
To import the system profile:
1. On the System Viewer Utility, select Platform Restore. The Platform Restore screen is displayed.
2. On the Platform Restore screen, select the Import Server Profile option and click Next. The options to select the
vFlash media or share location are displayed.
3. Select one of the following options:
• vFlash media: to restore the backup image from the Integrated Dell Remote Access Controller vFlash Card.
• Network share: to restore the backup image from a shared location on the network. If you choose this option
you must specify the following information:
• Existing share: Specify share location where you have saved the backup image. The drop-down list contains
the list of shares where you have previously created backup files for the system or collection.
• User name: Specify the user name to access the share location. You must specify the user name in the
following format: Domain\<username>.
• Password: Specify the password to access the share location and re-type the password to confirm it.
4. Click Next. Enter the backup file passphrase that you had specified when you took the backup.
5. Click Next. While importing the backup file, you can choose to retain the current RAID controller configuration, or
restore the backed up configuration from the backup file. Choose one of the following options:
• Preserve: to retain the existing RAID controller configuration.
• Delete: to delete the existing RAID controller configuration and import the configuration from the backup file.
NOTE: This does not restore content that was on the virtual disk during the backup. For example, Operating
System. This operation only creates a blank virtual disk and sets the attributes.
6. Click Next. A summary screen is displayed.
7. Click Finish to start the importing the backup file and submit the task to the Task Viewer.
Configuring Part Replacement Properties For A System
The Part Replacement feature provides an automatic update of firmware, or configuration, or both of a newly replaced
component in a system, to match that of the original part. The newly replaced components could include a PowerEdge
RAID controller, NIC or power supply, to match that of the original part. This feature is disabled by default on Lifecycle
Controller and may be enabled if required through Dell Lifecycle Controller Integration. It is a licensed feature and
requires the Dell vFlash SD card.
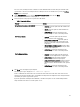
Use the System Viewer Utility to configure the Part Replacement properties for a system.
To configure the Part Replacement properties:
1. On the System Viewer Utility, select Platform Restore.
58