
Users Guide


• start now — to start the update.
• start on next reboot — to start the update when the target system reboots.
• schedule update — to set a date and time for the update. If the updates are scheduled in sequence within an
hour of each other; then a warning message is displayed.
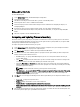
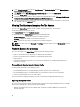
Comparing Hardware Configuration Profile
This feature enables you to compare and report the BIOS or Integrated Dell Remote Access Controller configuration
profiles that are applied on a system.
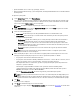
To compare the hardware configuration profile:
1. On the System Viewer Utility, click Compare Hardware Configuration Profile.
2. After the comparison report is generated, the screen displays the following colors to indicate the status of the
comparison:
• White — indicates that the profile that was applied and the profile on the target system are matching.
• Red — indicates that there is a mismatch while applying the profile to the target system.
• Grey — indicates that either the profile you applied is not configured, or the attribute is missing in the target
system.
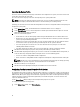
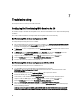
3. The Compare Hardware Configuration Profile screen displays the following fields:
• Attribute Name — lists the BIOS or Integrated Dell Remote Access Controller attributes depending on the
profile you have selected.
• System Value — lists the current value of the BIOS or Integrated Dell Remote Access Controller attribute. If
there are no values, the value displayed is NA.
• Profile Value — lists the value of the attributes in the profile. If there are no values, the value displayed is NA.
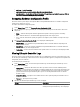
Viewing Lifecycle Controller Logs
This feature enables you to view the Lifecycle Controller logs in a readable format and save or export the logs to a .CSV
file. The Lifecycle Controller logs contains details such as history of firmware upgrades, changed events for updates and
configuration, and user comments.
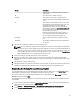
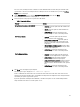
To view the Lifecycle Controller logs:
1. On the System Viewer Utility, select View Lifecycle Controller Logs. The View Lifecycle Controller Logs screen
displays the following fields:
• Existing Share— Specify the UNC or CIFS share where you want to save the file in the following format: \
\<IPAddress>\<share>\filename. The filename is provided by default and you cannot change the filename. This
information is cached for subsequent viewing. It is recommended that you specify an empty share each time
you want to view the Lifecycle Controller log files. If you use an existing location then make sure that the
location is empty.
• Domain\User Name — Specify the correct domain and user name required by Lifecycle Controller to access
the UNC or CIFS share.
• Password — Specify the correct password.
2. Click Next. The View Lifecycle Controller Logs screen is displayed.
Column
Description
Hostname This is the hostname of the system for which you are
viewing the Lifecycle Controller logs. This is displayed
54