
Users Guide


You can also import an existing profile and modify the configurations using the Array Builder. For more information on
importing a profile, see Importing a Profile.
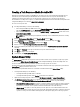
1. Launch the Array Builder by clicking Create a RAID Profile in the RAID Configuration screen in the System Viewer
Utility.
When you launch the Array Builder a default embedded controller is created.
2. Enter the configuration rule name in the Configuration Rule Name field.
3. Select the error handling rule from the drop-down menu. You can choose from:
4. Add new controllers and define rules for them, or edit the default controller and define the rules. For more
information, see Controllers.
5. Add or edit variable conditions for the default controller or the controller that you add. For more information, see
Variable Conditions.
6. Create new arrays from a variable condition, if required. For more information, see Arrays.
7. If you create an array, add additional disks, hot spares or global hot spares to the array.
8. Click Save to save the profile as a .XML file.
About Creating Array Builder
When you use the RAID profile that you created using Array Builder as part of the operating system deployment of DLCI
for Configuration Manager, it detects the existing controller(s) on the server as well as the disks attached to each
controller. It then tries to match the physical configuration(s) that the utility detected, to the logical configurations you
defined in the configuration rules. These array configuration rules are defined using a graphical, logical layout that
allows you to visualize how your array controllers will be configured. Rules are processed in the order displayed in the
Array Builder tree, so you know exactly which rules have priority.
Controllers
Controller elements contain variable condition elements. Controllers can be one of several configuration types:
• The embedded controller
• A controller in slot "X"
• Any controller with "X" disks
• Any controller with "X" disks or more
• All remaining controllers
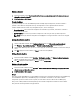
Adding a Controller
To add a controller:
1. Select a controller from the list, or select an embedded controller. The Controllers drop-down menu to your left is
enabled.
2. Click Controllers→ New Controller. The Controller Configuration window is displayed.
3. Under Controller Selection Criteria, select from the following options:
4. Under Variable Matching Criteria, you can set a rule to apply this configuration only if it matches certain criteria
that you select. Select Apply this configuration only when the variable to enable the rule setting options apply.
5. Click OK.
Editing a Controller
To edit a controller:
Select the controller and click Controllers → Edit Controller . The Controller Configuration window is displayed where
you can make changes to your controller.
26