
Users Guide
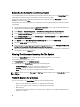

To view the Lifecycle Controller logs:
1. On the System Viewer Utility, select View Lifecycle Controller Logs. The View Lifecycle Controller Logs screen
displays the following fields:
– Existing Share— Specify the UNC or CIFS share where you want to save the file in the following format: \
\<IPAddress>\<share>\filename. The filename is provided by default and you cannot change the filename.
This information is cached for subsequent viewing. It is recommended that you specify an empty share
each time you want to view the Lifecycle Controller log files. If you use an existing location then make sure
that the location is empty.
– Domain\User Name — Specify the correct domain and user name required by Lifecycle Controller to
access the UNC or CIFS share.
– Password — Specify the correct password.
2. Click Next. The View Lifecycle Controller Logs screen is displayed.
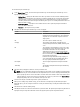
Column Description
Hostname This is the hostname of the system for which you are
viewing the Lifecycle Controller logs. This is displayed
only in the case of a collection of systems and not a
single system.
No. This is the sequence number of the log.
Category The category of the Lifecycle Controller Log. For
example, Configuration Service, iDRAC, Inventory, and
so on.
ID This is the ID associated with an error message. Click
the hyperlink to get more information on the error and
the recommended action. You can periodically
download the latest message registry from the Dell
support website available at support.dell.com/manuals.
For more information, see Downloading and Updating
the Latest Message Registry.
If the ID is missing in the local message registry, an
error is displayed and you must download the latest
message registry file from the Dell support site.
Description The message/description of the Lifecycle Controller
Log.
Timestamp The date/time stamp when the Lifecycle Controller log
was created.
3. Click View after specifying the number of records you want to view.
NOTE: This step is applicable only when you manually enter the number of records without selecting from the
drop-down list. If you select the number from the drop-down list, the records are displayed automatically. You
cannot specify any value lesser than the number of records that can be viewed at a time. If you want to view
reduced number of records, then you must sort and filter the records per system or close the System Viewer
Utility (Config Utility in the case of a collection) and reopen the same.
4. To fetch fresh Lifecycle Controller logs from the system, click Refresh.
5. When you are loading a large number of logs, you can click Pause to temporarily stop the loading of log files.
During this phase, you can change the number of records you want to view by selecting the number from the drop-
down list.
6. Click Resume to resume the loading of logs.
7. Click Export to CSV to save the file in CSV format at a specific location. This option exports only the log files that are
displayed on the grid. If you have filtered the data on the grid, this option exports only the filtered data.
59