
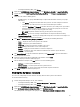
Users Guide


<System Name>, <variable1 name> = <variable1 value>, <variable2
name>=<variable2 value>.
For Example:
<System Name1>, InstallOSVer=Win2K3,CountDisks=5
<System Name2>, InstallOSVer=Win2K8,CountDisks=4
<System Name3>, CountDisks=4,RAIDController=H700
5. Click Next.
The screen displays a comparison report of the variable values already present in the system and the variable
values present in the .CSV file. The following details are displayed:
– Name — The name of the system.
– Variable Name — The name of the variable.
– Value in the .CSV file — The value of the variable in the .CSV file. If the variable is not present in the file,
this column displays the value NA.
– Value in the System — The value of the variable in the system. If the variable is not present on the system,
this column displays the value NA.
– Action — The action to be taken for the variable. This action always gives precedence to the variables and
the values present in the .CSV file.
Table 3. Action And Description
Action Description
ADD Add the variable to the target system. Indicates that the
variable is present on the file and not available on the
system.
DELETE Delete the variable from the target system. Indicates
that the variable is not present on the file but available
on the system.
UPDATE Update the variable on the target system with the value
from the .CSV file. Indicates to replace the variable on
the system with the variable on the file.
NONE Take no action.
NA Not applicable
6. Select the variables you want to import.
By default, the records with ADD and UPDATE actions on the grid are selected. The records with the DELETE action
are not selected. You must select the record if you want to delete it from the system.
You can also filter the records on the grid based on the system name.
7. Click Next.
8. Click Save As to save the report as a .CSV file in any location.
9. After the import process is complete, click Close to close the utility.
49