
Users Guide
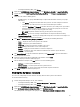


3. Select the Platform Restore option.
The steps to import the backup files for a collection are similar to that of importing a backup file for a single system.
4. Follow step 2 to step 6 as given in Importing the System Profile
The list of systems for which the backup files exist are displayed in a grid.
5. Select the systems for which you want to import the backup files and click Next.
A task is submitted to the Task Viewer. You can launch the Task Viewer to view the status of the tasks.
NOTE: If a valid backup file is not available on the network share location for any system, the grid displays the
system with the value No in the Backup File column and the check box is disabled.
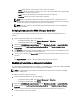
Configuring Part Replacement Properties For A Collection
The steps to configure Part Replacement properties for a collection of systems are similar to that of configuring the
properties for a single system. However, the check for valid licenses for the collection of systems is performed only after
you complete configuring the other properties and submit the task.
For a 11G server, the utility checks for a valid license of the Dell vFlash SD card on the Lifecycle Controller of the system
and for a 12G server, the utility checks for an Enterprise license.
To launch the Platform Restore screen for a collection:
1. From the Configuration Manager console, do the following:
– In Configuration Manager 2007, under Computer Management → Collections.
– In Configuration Manager 2012, under Devices.
2. Right-click on All Dell Lifecycle Controller Servers and select Dell Lifecycle Controller → Launch Config Utility.
3. Select the Platform Restore option.
For more information about configuring Part Replacement properties, see Configuring Part Replacement Properties
for a System
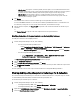
Comparing NIC Or CNA Profiles Against Systems In A Collection
This feature enables you to generate a comparison report of how a NIC/CNA profile is applied to systems and identify
any mismatches from the target systems.
To generate a comparison report:
1. From the Configuration Manager console, do the following:
– In Configuration Manager 2007, under Computer Management → Collections.
– In Configuration Manager 2012, under Devices.
2. Right-click on All Dell Lifecycle Controller Servers and select Dell Lifecycle Controller → Launch Config Utility.
3. Select the Network Adapter Comparison Report option.
4. On the Network Adapter Comparison Report screen, click Browse and select the NIC/CNA profile file that you have
applied to the collection.
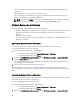
A progress bar indicates that the target systems are scanned and a comparison report is generated.
5. After the comparison report is generated, the following colors are displayed:
– White — indicates that the profile that was applied and the profile on the target system are matching.
– Red — indicates that there is a mismatch while applying the profile to the target system.
– Grey — indicates that either the profile you applied is not configured, or the attribute is missing in the
target system.
45