
Users Guide


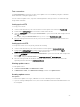
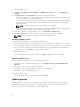
Table Of Contents
- Dell Lifecycle Controller Integration Version 1.2 for Microsoft System Center 2012 Virtual Machine Manager User’s Guide
- About Dell Lifecycle Controller Integration for Microsoft System Center 2012 Virtual Machine Manager
- Installing and setting up DLCI Console Add-in
- Getting Started
- Workflows
- About golden configurations
- Creating golden configurations
- Creating, managing, and deleting credential profiles
- Creating, managing, and deleting update sources
- Creating, managing, and deleting custom update groups
- Applying updates on servers, or server groups
- Creating, managing, and deleting protection vaults
- Exporting server profile
- Importing server profile
- Hypervisor deployment
- Deleting servers
- Setting up the environment for deploying hypervisors
- Server discovery
- System requirements for managed systems
- Enabling CSIOR in managed systems
- Discovering servers using auto discovery
- Discovering servers using manual discovery
- Deleting servers from DLCI Console
- Viewing device inventory
- Synchronization with SC2012 VMM
- Synchronizing appliance with SCVMM
- Resolving synchronization errors
- Launching iDRAC Console
- License for the appliance
- Server management
- Profiles and templates
- About credential profile
- Creating hardware profile
- Modifying hardware configuration profile
- Deleting hardware profile
- Creating hypervisor profile
- Modifying hypervisor profile
- Deleting hypervisor profile
- WinPE Update
- About hypervisor deployment
- Creating deployment template
- Modifying deployment template
- Deleting deployment template
- Deploying hypervisors
- Viewing information in appliance
- Troubleshooting
- Account deletion in SC2012 VMM
- Comparison report not displayed in Maintenance Center
- Compatibility issue of appliance with ADK
- Empty cluster update group does not get deleted during autodiscovery or synchronization
- Discovery jobs not submitted
- Duplicate VRTX chassis group gets created
- Exporting configuration profile of another server after IP address is changed
- Error accessing the appliance after changing network configuration
- Error accessing plugin after updating SCVMM R2
- Failure to connect to server
- Failure of creation of update source
- Failure of firmware update on cluster update group
- Failure of a scheduled job on an update group
- Failure of firmware update because of job queue being full
- Failure to connect to FTP using system default update source
- Failure to create a repository during a firmware update
- Failure to delete a custom update group
- Failure to export server profiles
- Firmware update on a few components irrespective of the selection
- IG installation issue while running multiple instances of the installer on the same server
- Importing server profile job gets timed out after two hours
- Hypervisor deployment failure
- Hypervisor deployment failure due to driver files retained in library share
- Latest inventory information is not displayed even after firmware update
- SC2012 VMM error 21119 while adding servers to active directory
- Connection lost between appliance and Integration Gateway
- Hypervisor deployment fails for 11th generation PowerEdge blade servers when using Active Directory
- RAID configuration failure for virtual disks with RAID10
- Configuration of RAID failure due to configuration of hot spares on software RAID S130
- Accessing documents from Dell support site

To create an update source:
1. In DLCI Console Add-in for SC2012 VMM, click Maintenance Center and then click Maintenance
Settings.
2. In Update Source click Create New and provide the required information.
• If you are creating an FTP source, provide your FTP credentials along with proxy credentials if the
FTP site is reachable by using proxy credentials.
• If you are creating a DRM source, provide your Windows credentials and ensure that the Windows
shared location is accessible. In the location field provide the complete path of the catalog file
with the file name.
NOTE: Use only 32–bit DUPs to create the update source in DRM.
• If you are creating an update source of type HTTP, provide the complete path of catalog with the
catalog name and your proxy credentials to access the update source.
3. (Optional) To make it as a default update source select Make this as default source.
4. Click Test Connection to verify the location of the update source, and then click Save.
NOTE: Once the location is verified, you can create the update source.
Modifying update source
Consider the following when you are modifying an update source:
• You cannot change the type of an update source and the location after the update source is created.
• You can modify an update source even if the update source is in use by an in-progress or a scheduled
job, or if it is used in a deployment template. A warning message is displayed while modifying the in-
use update source. Click Confirm to continue with the changes.
To modify an update source:
Select the update source you want to modify, click Edit and update the source as required.
Deleting update source
You cannot delete an update source in the following circumstances:
• The update source is a predefined update source — Dell Online Catalog and DELL ONLINE HTTP
CATALOG.
• The update source is used in a deployment template.
• The update source is being used by an in-progress, or a scheduled job.
• The update source is a default update source.
To delete an update source:
Select the update source you want to delete and click Delete.
Update groups
Update groups are a group of servers that require similar update management. There are two types of
update groups available, predefined and custom update groups. You can view the predefined groups.
However, you can create, and maintain the custom update groups.
30