
Users Guide


NOTE: You can also use the System Setup utility during startup for conguring iDRAC. For more information about the
System Setup utility, see the Using The System Setup Program And Boot Manager chapter in this User's Guide.
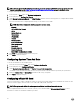
To congure and manage the iDRAC parameters:
1. In the left pane of Home page, click Hardware Conguration.
2. In the right pane, click Conguration Wizards.
3. Under System Conguration Wizards, click iDRAC Settings, and then click the following options to congure dierent iDRAC
parameters.
For more information about conguring iDRAC settings, see the iDRAC7 User's Guide.
NOTE: Click System Summary to view the parameters and their values.
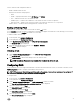
• Network
• OS to iDRAC Pass Through
• Alerts
• System Event Log
• Virtual Media
• vFlash Media
• Thermal
• System Location
• Front Panel Security
• User Conguration
• Smart Card
• Lifecycle Controller
• Remote Enablement
• Reset iDRAC Conguration to defaults
4. Click Back after setting the parameters for each option.
5. Click Finish to apply the changes.
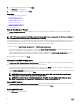
Conguring System Time And Date
To set the time and date for the managed system:
1. From the Lifecycle Controller Home page, select Hardware Conguration.
2. In the right pane, select Conguration Wizards.
3. Under System Conguration Wizards, click System Time and Date Conguration.
The default system time and system date shown in Lifecycle Controller is the date and time reported by the system BIOS.
4. Modify the System Time and System Date (HH:MM:SS AM or PM), as required.
5. Click Finish to apply the changes.
Conguring vFlash SD Card
Use the licensed feature to enable or disable the vFlash SD card, check the health and properties, and initialize the vFlash SD card.
Lifecycle Controller support vFlash SD cards of sizes 1 GB, 2 GB, 8 GB, 16 GB, and 32 GB.
NOTE: The options under vFlash SD card are grayed-out if there is no SD card inserted in the slot.
See the Integrated Dell Remote Access Controller 7 (iDRAC7) User’s Guide available at dell.com/support/manuals for more
information on vFlash SD card and the installation procedure.
36